


In recent years, the permissions landscape has evolved considerably, and the best practices for permission management on SharePoint sites have also changed.
With the introduction of Microsoft 365 groups (formally Office 365 groups) and Microsoft Teams, the structures used in SharePoint have needed to adapt from the deep sub-site architecture used in the past to a flat architecture informed by how people work using Microsoft Teams.
Teams and their linked SharePoint team sites are designed to be collaborative spaces where all members can edit content, but sometimes you need a workspace with a dual purpose which includes read-only publishing to a larger audience.
In this guide, we’re going to look at the easiest way to achieve a workspace in which a core group of users collaborate using Teams, and then publish information in read-only form to the rest of the organisation.
But first…
Understanding the permissions architecture
Microsoft 365 groups
Microsoft 365 groups are the glue that holds together much of the architecture in the Microsoft ecosystem and are used to simplify permissions management by encouraging a flat infrastructure that requires less IT administration than before, especially in the case of SharePoint.
When a new M365 group is created, this is what happens:
- Group creation – a new M365 group is created, along with a unique email address.
- Shared Mailbox – a shared mailbox is created, allowing group members to access and manage emails sent to the group’s email address.
- Calendar – as an extension of the mailbox, a group calendar is also created and accessible to group members.
- SharePoint site – a SharePoint team site (group-connected) is created to centrally store and collaborate on content.
- Microsoft Teams team – if the option was selected, a team is created.
- Other assets – several other services are also created as a result of the M365 group creation - such as a Microsoft OneNote notebook and a Planner plan.
In addition to all the assets created for the group, membership is automatically established. The user who created the group is set as the default owner, allowing them to administer the group settings and membership.
SharePoint Groups
SharePoint groups are more straight forward than M365 groups as they are bound to the site collection that they are created in, and do not have any additional connected services. By default, 3 groups are created when a new SharePoint site is created:
- [Site name] Owners – Full control of the site.
- [Site name] Members – Can add, edit and delete lists; can view, add, update and delete list items and documents.
- [Site name] Visitors – Can view pages and list items and download documents.
You can use these groups to manage access on your site. If needed, you can also adjust the level of access each group and user has.
Our scenario – Innovation hub
So how do these two methods of access - M365 Groups vs SharePoint Groups - work together in a practical example? To understand this, we are going to build a workspace to cater for an example scenario.
In our scenario, we have a group of people that curate innovation-related materials. They need a space to first collaborate and create this content in, and then share it in read-only format with the rest of the organization.
Usually, publishing to the broader organisation is achieved with a communication site, but the innovation team are highly interactive and collaborative in their creation process and want to use conversations and other rich functionality in Teams to create the content. Because the content evolves so dynamically, they also don’t want to have a separate publishing process to a separate location and do not mind people seeing content in progress.
Step 1 – Create the core collaborative space
To get started, we need to create a new team that will give our Innovation folks a space to collaborate and create content in.
We create a new private Innovation hub team and add members and owners.
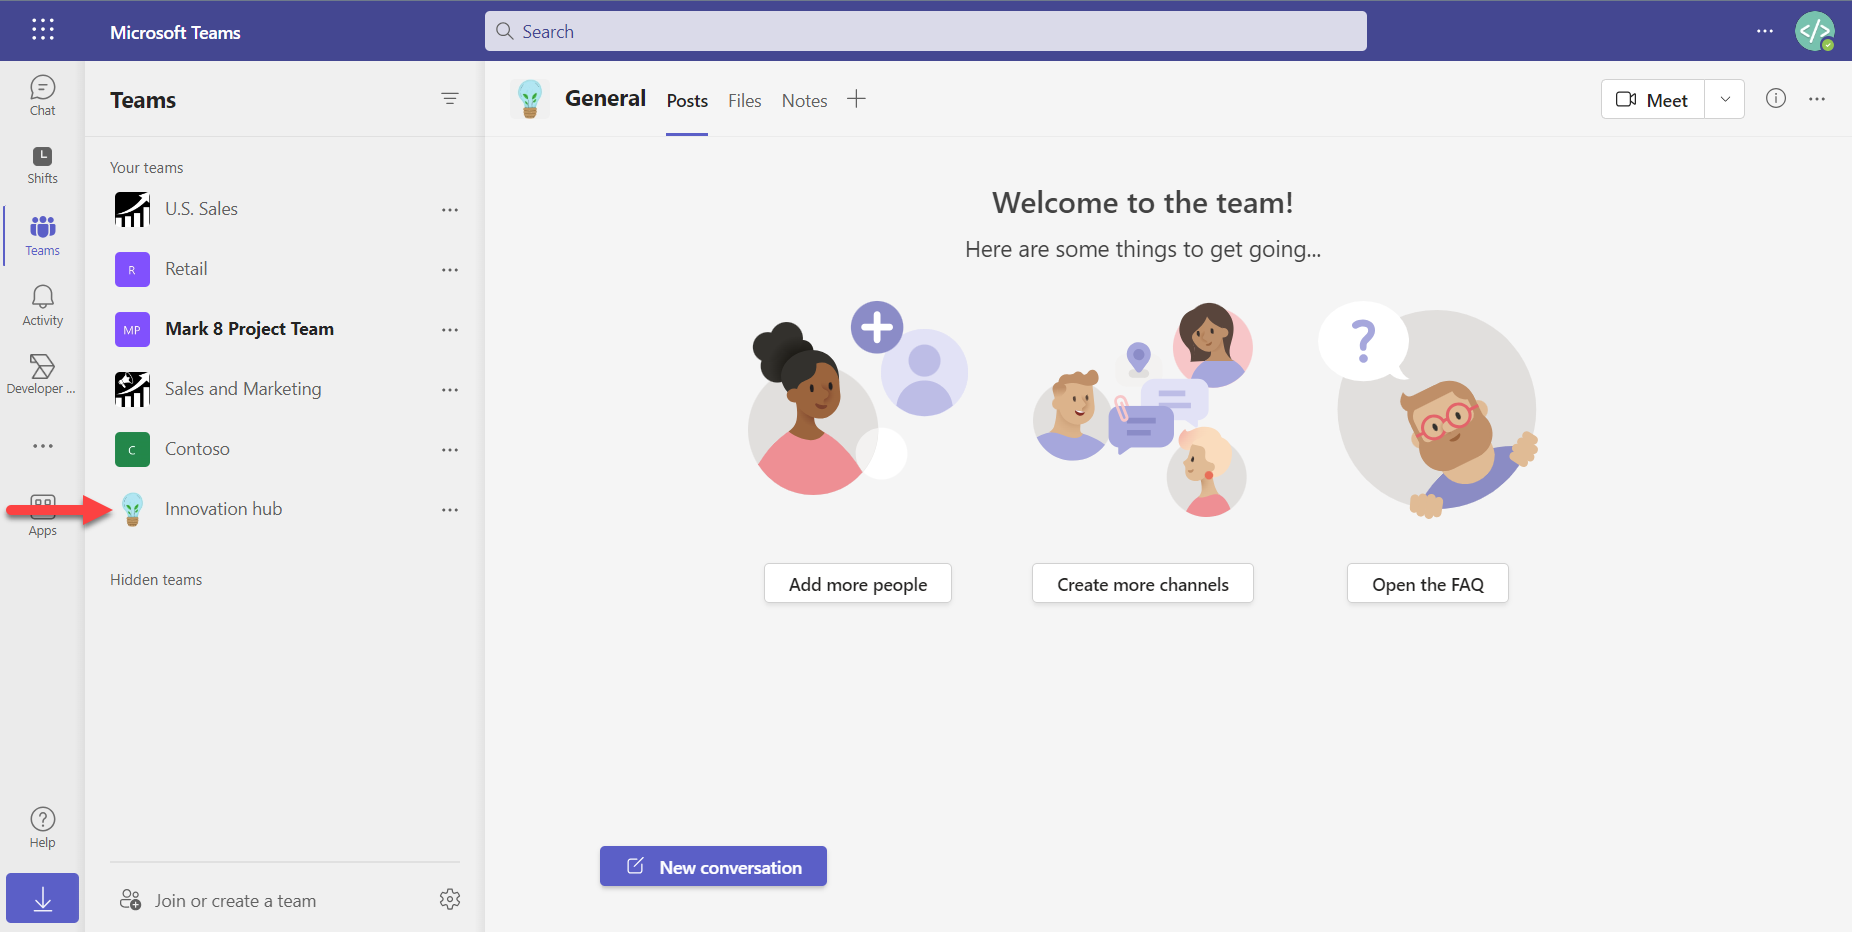
With the team created, several other assets are automatically created, including a group- connected SharePoint team site. By default, this team site hosts a document library that is directly linked to the ‘Files’ tab in our team. When a new file is created in the team, it is stored in this SharePoint library.
Next, we will need to look at how the rest of the organization will consume the content that is created.
Step 2 – Choose the method to grant read-only access to the rest of the organization
Because the rest of the organisation should not be able to edit the contents of the site, nor access the team itself, we are going to add them only to the SharePoint team site (and not to the team), with read-only permission.
Adding the entire organisation is best achieved with a group. We could use one of these types of groups:
- Active Directory Security group
- 'Everyone' SharePoint group
- Org-wide team
All three of these options will be added by using the ‘Share site only’ option and giving them ‘Read’ access.
AD Security group
Active Directory security groups are tried and tested and work well in this scenario. If your AD is well maintained this is a good option to use, with the ability to target either the entire organisation or specific parts of it.
'Everyone' SharePoint group
SharePoint has several built-in, automatically maintained groups that can be used to give access to large groups of users, including the ‘Everyone’ group. As the name suggested, the ‘Everyone’ group includes all users in your Azure AD.
What if I don’t see the ‘Everyone’ group?
If you don’t see the ‘Everyone' group, you can enable this feature through the SharePoint Online Management Shell using the following command:
Set-SPOTenant -ShowEveryoneClaim $true
You can read up more about this in the Microsoft documentation
This is easy to use and requires no maintenance, the downside of this is that the ‘Everyone’ group also includes guest users on your tenant. In our scenario, we don’t want external users to see our policies and procedures so we would most likely not use this option.
Organization-wide team
An Org-wide team is a team that is automatically updated to include all of your organization’s users. As such, it is M365 group connected and can be used to grant SharePoint access to your users. If you are using Org-wide teams in your organization, it is recommended that you use this option.
Learn how to create an organization-wide team
Step 3 – Grant access
In our case, we have a well-maintained AD structure with a security group called ‘allContosoUsers’, so we will be using this group to grant access.
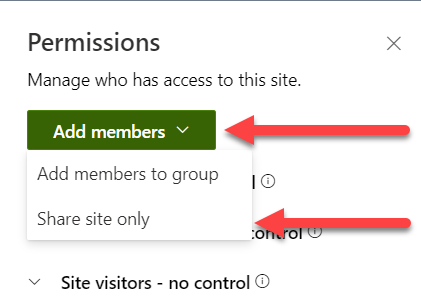
From the Innovation hub's SharePoint team site, select ‘Add members’ and then select the ‘Share site only’ option. Remember, we don’t want to add the group to our team, we only want to grant access to the content published on the SharePoint site.
In the next menu, we will search for ‘allContosoUsers’, set their access to ‘Read’ and make sure to deselect the ‘Send email’ option (in case the group is mail-enabled), and select ‘Add’.
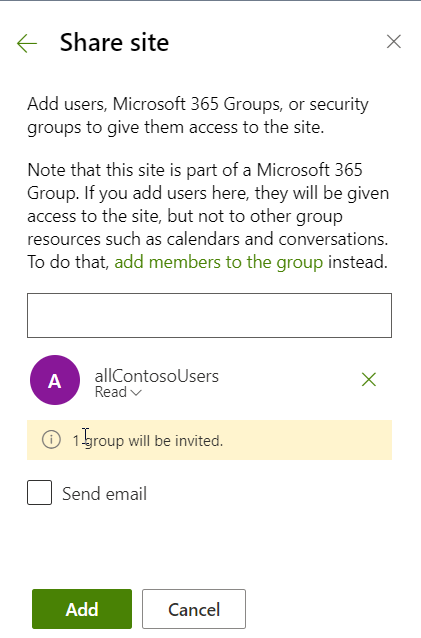
It’s as simple as that, our entire organization now has access to read all of the content stored on the Innovation hub team site - but without having access to the team - while members of the Innovation hub team can produce this content via Teams as per normal.
Final considerations
Content, navigation and user experience
- We've granted access to the team site, but you still need to make the entire organisation aware of the site. You might publish a link on the global navigation or promote the site in a news post.
- Some work needs to be done to prepare the team site's home page and navigation for broader consumption. In default form, it will not be very inviting or useful to read-only users without context.
- When considering multi-role access to content, there are many ways to achieve it but one of the key aspects to keep in mind is that the simpler solution, the more likely it is to be user-friendly and achieve the best results.
Role-Playing
Once you have the solution you want to use in mind, step through the process that each role will need to follow to work within your solution. If there are more additional steps that a certain role needs to remember, it’s most likely going to cause more resistance to the solution.
Permission walls
When creating these kinds of workspaces, people often unintentionally create a complex collection of permission walls, stating that group X should only view certain content and not others, Group Y should see yet another section of the content but also a small portion of what Group X sees, etc.
Take a step back and question whether it really is necessary to make these sort of permission exclusions. The fewer exclusions you can get away with the better.


