Within your SharePoint environment, content is stored in multiple locations across teams, departments, and audiences. This makes it difficult to govern.
By utilizing content types and DLP (Data Loss Prevention) policies, you can effectively govern particular pieces of content across your organization. In this guide, we will step through how to configure this on your tenant.
Our Scenario – Sensitive Contract Documentation
Ongoing improvements in Microsoft’s Unified Sharing Experience has increased the problem of oversharing. It has in many instances become almost too easy to share a document or folder.
In our organization, contract documentation is dispersed among multiple departments and their SharePoint sites. Our goal is to govern the external sharing of the contract documents to prevent accidental oversharing.
We also want to provide a mechanism to be able to share a contract document with additional justification that will be sent to the owners of the site. To do this, we will be implementing a content type and corresponding DLP Policy to a test site, Contract POC, that we can then use to verify our solution before implementing it in our organization.
Requirements
Licensing
- SharePoint K, P1, or P2 – These services are included within other licenses such as M365 Business, or M365 Enterprise.
- If you have Business Standard or Business Premium licenses, you will need the Office 365 data loss prevention add-on. DLP is included in E3 and E5 licensing.
Apps & Modules
- PowerShell – There are several versions and ways to access PowerShell, in our guide we will use PowerShell ISE.
- ExchangeOnlineManagement – The CMDLTs you will need to run for this scenario are contained in the ExchangeOnlineManagement module V3 and later.
Roles
- SharePoint Administrator – Mapping of the Crawled Properties requires the SharePoint Administrator role.
- Compliance Administrator – To create the required DLP Policy and DLP Compliance Rule, you will need to be a Compliance Administrator in the Microsoft Purview Admin Center.
Step 1 – Create & Publish the Content Type
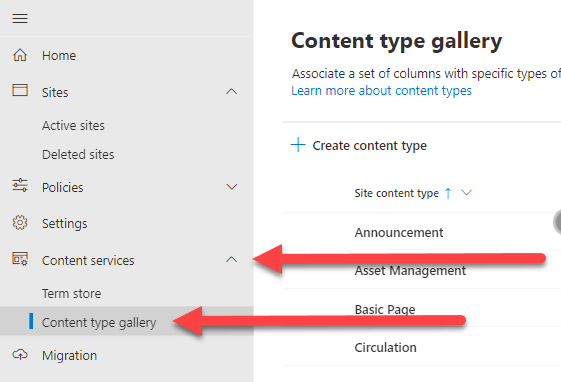
To enable automatic governance of content at a document level, we will create a new content type that suits our needs. To do this, go to the SharePoint admin center and open the 'Content type gallery' below the 'Content services' menu.
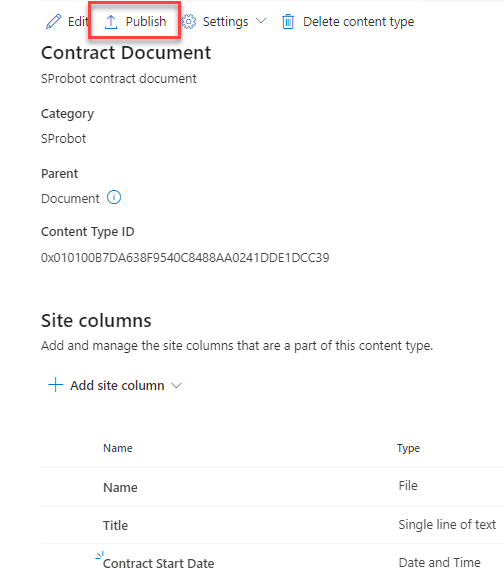
From here, we are going to create a new document content type with the following details:
- Name - Contract Document
- Description - SProbot contract document
- Category - SProbot
- Parent Content Type - Parent Category - Document Content Type
- Parent Content Type - Content Type - Document

With the content type created, add the following columns:
- Contract Start Date - The field type of Date & Time must be applied.
- Contract End Date - The field type of Date & Time must be applied.
- Responsible Person - The field type of Person or Group must be applied.
Once you have added your columns, 'Publish' your content type to make it available to apply in your SharePoint sites.
Step 2 – Applying the Content Type
With the Contract Document content type published, the next step is to add it to the Contract POC site's document library. To do this, we first need to update the document library to allow for the 'management of content types' and then apply the content type.
Enable management of content types
Go to the default document library's settings and then open the 'More library settings' option.
Add the Contract Document content type
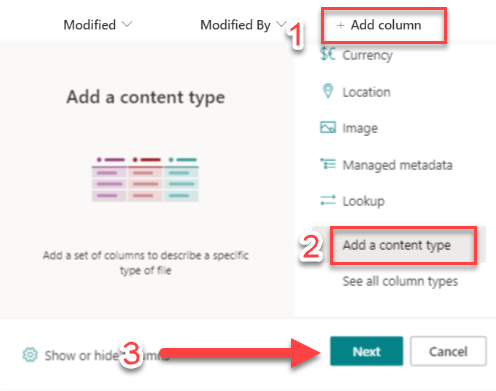
We can now add the Contract Document content type to our library. To do this, on the library view:
- Select '+ Add column'.
- Scroll down to the bottom of the list of options and select 'Add a content type'.
- Select 'Next'.
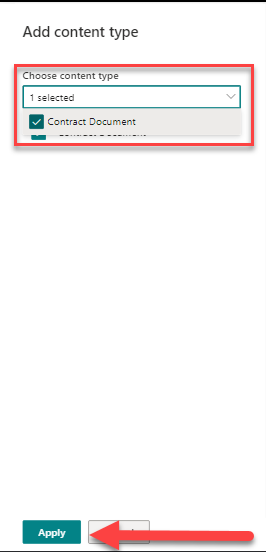
Select the 'Contract Document' content type and select 'Apply'.
The content type should now be applied to our library. We can add a few test documents and select their content type as "Contract Document" to ensure it is configured correctly. This will also be needed later when testing our crawled properties.

By adding documents with our content type applied, the library will be re-indexed, enabling the documents to be returned in search results. Re-indexing for a SharePoint Online library will take anywhere between 15 minutes and an hour depending on where in the automated schedule you request is slotted in. This schedule is controlled by Microsoft and can’t be changed.
Step 3 – Mapping the Crawled Properties
To be able to search for our Contract Documents at an organization level in SharePoint, the OWS_CONTENTTYPE crawled property needs to be mapped to a managed property. To do this, in the SharePoint admin center, navigate to the search center.

Open the 'Manage Search Schema' link.

Search for 'RefinableString' and open any of the results that do not already have a crawled property applied. In our case, we will be using 'RefinableString00' to map our crawled property to.

We will be applying the following changes to 'RefinableString00':
- Alias - add the alias 'CONTENTTYPE'
- Mapping - OWS_CONTENTTYPE
Once mapped and saved, your managed property should look like this:

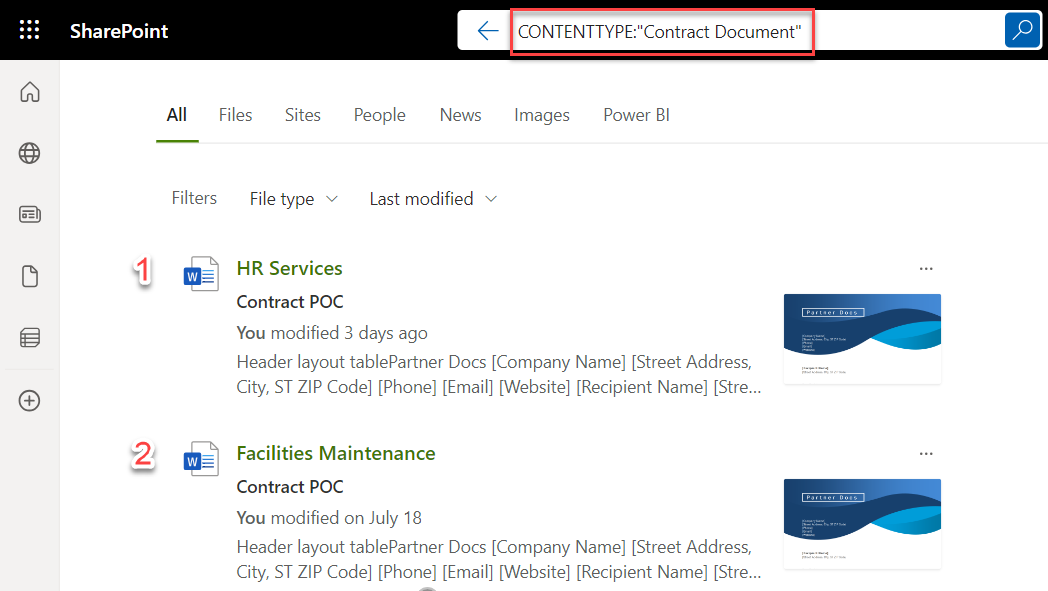
We have successfully finished the search component of our implementation, and after our Step 3 documents undergo re-indexing, we can proceed to test and validate our search's ability to locate the desired results. To do this, simply enter 'CONTENTTYPE:"Contract Document"' into the search bar of any SharePoint site. Here, 'CONTENTTYPE' corresponds to the Alias we incorporated into our managed property, and "Contract Document" pertains to the content type we established for our contract documents.
Only documents matching this content type are returned as search results.
Step 4 – Create a DLP Policy
To govern and prevent our contract documentation from being shared to external users, we need to create a Data Loss Prevention (DLP) Policy. This can be achieved via the Microsoft Purview compliance portal or via PowerShell. In our example, we will be using the PowerShell method.
Connect to the Compliance Module
To connect to the compliance module of Exchange Online, you will need to specify an IPPS Session otherwise you will not have access to the compliance commands required:
Import-Module ExchangeOnlineManagement
Connect-IPPSSession
Create the DLP Policy
This new compliance policy will be enabled by default and applicable to all SharePoint sites within our tenant.
New-DlpCompliancePolicy -Name "Contract Document Policy" -SharePointLocation All -Mode EnableStep 5 - Create a DLP Compliance Rule
With the Contract Document Policy created, we now need to create a compliance rule that will specify what content the policy is applied to and what rules will apply to that content. To do this, we run the following command:
New-DlpComplianceRule -Name Contract_content -Policy "Contract Document Policy"
-AccessScope NotInOrganization -BlockAccess $true -BlockAccessScope PerUser
-ContentPropertyContainsWords "ContentType:Contract Document" -Disabled $false
-NotifyAllowOverride "WithJustification"
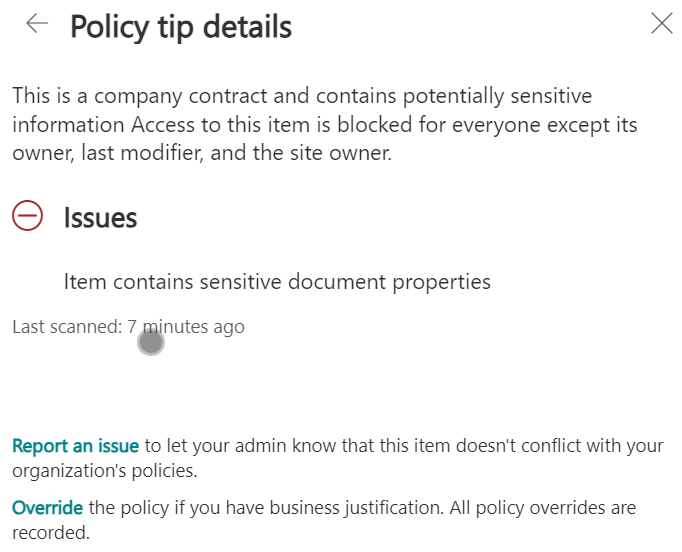
-NotifyPolicyTipCustomText "This is a company contract and contains potentially sensitive information"
-NotifyUser "Owner"
With this rule created and turned on, we will now need to wait for it to applied to our content. DLP policies are synchronized with the designated locations specified in the policy settings. Subsequently, they initiate an asynchronous process to assess the content and enforce the external sharing restrictions we've configured within the rule.
Step 6 – Test External Sharing
Once the DLP policy has taken effect, you will be able to see that the test documents that were uploaded to the Contract POC site have been marked with a ⛔ symbol in the library:

When attempting to share one of these documents with 'joesoap@example.com' (who is external to our tenant) a warning is shown stating that the document contains sensitive information and cannot be shared externally:

If we click on 'View policy tip' we see the message that was specified in the DLP Compliance Rule in Step 5 as well as some additional options including an 'Override' option that allows us to provide business justification for sharing this document externally:
With our tests completed, we can confirm that this has been successfully implemented and is ready to be rolled out to our organization to ensure our contract documentation is protected from accidental sharing.
Final Considerations
Simple Content Types
Simple content types ensure ease of implemented across the organization and minimize resistance to adoption. As your organization matures with its use and understanding of content types, you can start to increase the complexity of the content types used for better content governance.
Change Management
Using content types in this solution relies on users being made aware of and educated about using content types to help categorize their content. If proper change management isn't used to implement this, it will ultimately not be an effective governance solution within your organization.
Bonus: Adding Document Templates to Content Types
To associate a document template with the content type you can either upload a new document template or use an one from your SharePoint environment and simply link the document.
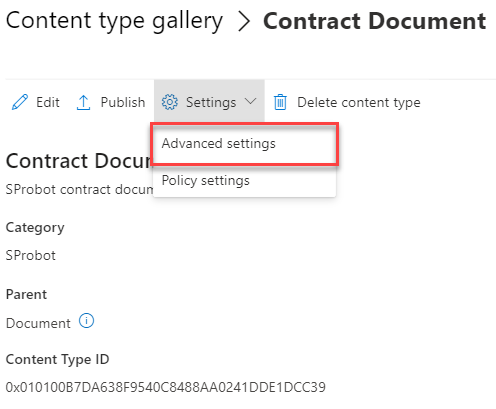
To do this, open the advanced settings of your content type:
Select the document template option you want to use as well as the document template itself and save your changes.
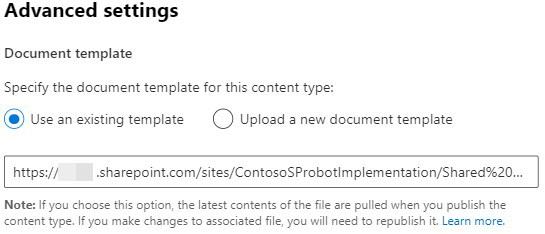
*Note, the content type will need to be republished each time there are changes to the document template