


In this article, we will step through how to link a document set with a Microsoft List item to better manage associated files, instead of attaching them directly to the item.
Requirements
Roles & Licensing
- Site Admin/Owner – To enable and create document sets on the site you are implementing your solution on
- M365 Business or Enterprise License – Any Microsoft Business or Enterprise license that includes SharePoint P1 or P2 and Power Automate
Our Scenario
In our department, we generate blog articles for publication on our public site. Currently, we use a SharePoint team site containing a list based on the Content scheduler list template to manage the creation of these articles.
Each article has a set of supporting images and other files, but we’ve found that the process of attaching these directly to list items can be cumbersome. Is there a better way to do this? Yes! For each article, we can use a document set to contain all its associated files and then link the document set to the article's list item. This will make it easy to keep files updated and speed up our editing process.
Think of a document set as a reusable virtual folder which makes it easy to manage a related set of files in a single location.
Step 1 – Enable Document Sets
On our site, we are going to open the site settings and navigate to the ‘Site Collection Features’ page. On this page, find and activate the ‘Document Sets’ feature:

Step 2 – Create a SharePoint Library with Document Sets
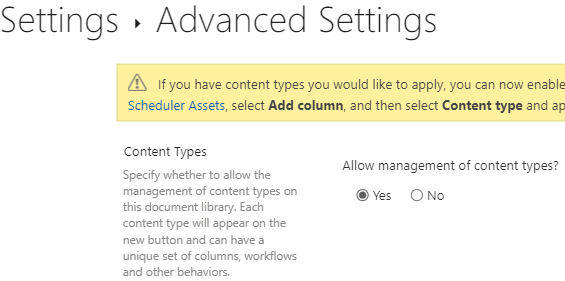
With document sets enabled, we can now create our new ‘Content Scheduler Assets’ library and apply the Document Set content type to it. To do this, create a new document library and in the ‘Advanced Settings’ section of the library settings, allow content types to be applied to the library.
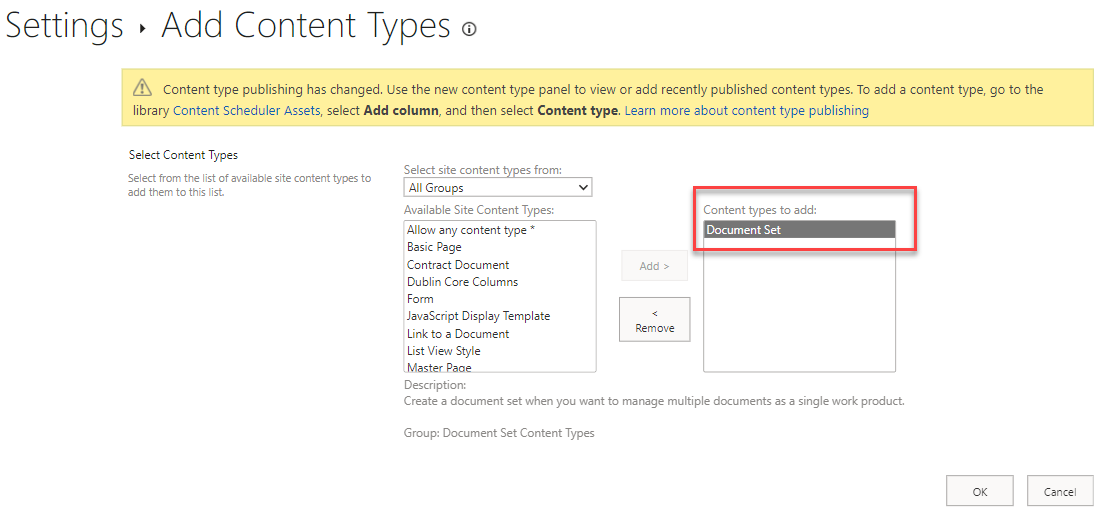
From the library settings page, select the ‘Add from existing site content types’ link and add the standard ‘Document Set’ content type to the library.
*Note, you can create a custom document set content type before adding it to the library if you need extensive customizability, but in this article, we’re simply going to customize the standard document set.
Step 3 – Add custom columns to your document set
To enhance the searchability of our assets, we’re going to add custom columns that will be applied to the document sets and the content within them. In our case, we want to apply the following columns to our assets:
- Author (Person column)
- Content type (Choice column) – The choices available here will reflect the choices in our ‘Content Scheduler’ list.
- Content Schedule (Hyperlink column)
The ‘Author’ and ‘Content type’ columns exist in our Content Scheduler list and when a new item is added to the Content Scheduler list, we want them to be applied to the document set that is created automatically, and in turn the items uploaded into the document set. The ‘Content Schedule’ column will be linked from the document set back to the Content Scheduler item.
Step 4 – Configure your document set
From the library settings page of your Content Scheduler Assets library, open your Document Set content type and open the ‘Document Set settings’ link.

From here, we are going to set the ‘Shared Columns’. The columns marked will be automatically set against all content uploaded into a document set. For this, we will mark the ‘Author’, ‘Content type’, and ‘Content Schedule’ columns.

*Note, there are several other settings that can be configured here that we are not covering in this scenario.
Step 5 – Add a custom column to the Content scheduler list
To link to our Content Scheduler Assets library from our ‘Content scheduler’ list items, we will need to add a new hyperlink column, ‘Assets’. This column will be filled out by our automation in Step 6.
Step 6 – Automate Document Set creation
With our list and library configuration completed, we can now automate the document set creation as well as link up our Content Scheduler item with the relevant document set.
Step 6.1 - Create Power Automate flow
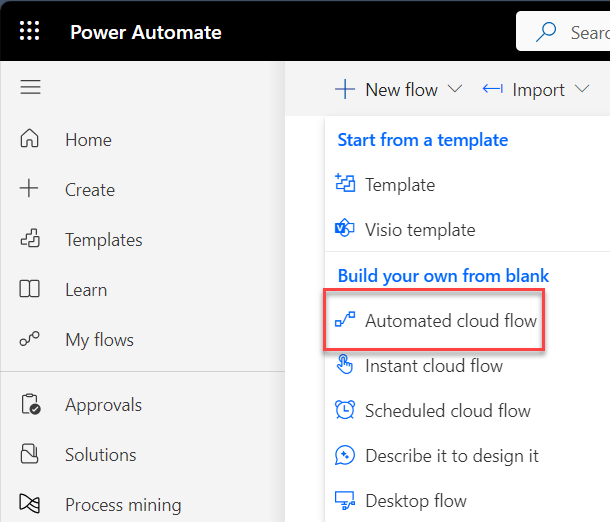
In Power Automate create a new ‘Automated cloud flow’
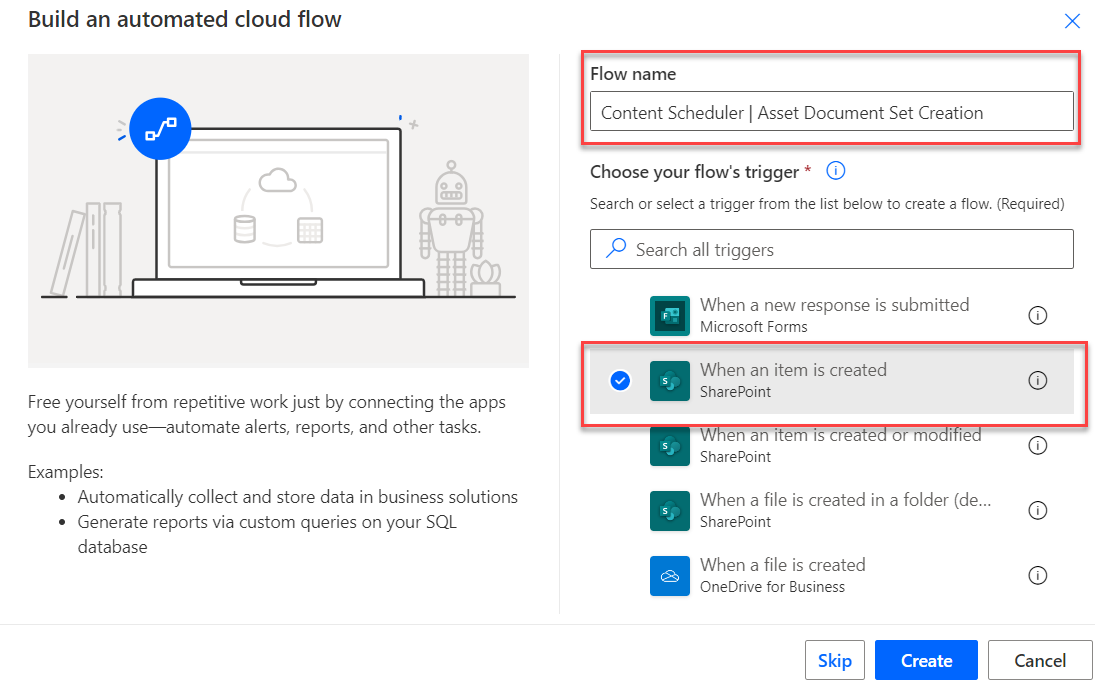
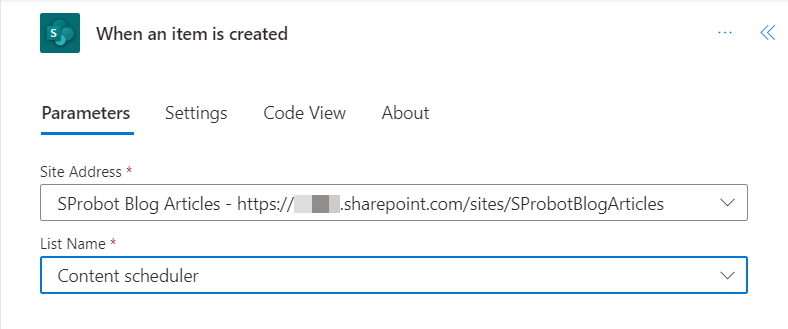
We can name our flow ‘Content Scheduler | Asset Document Set Creation’ and set the flow’s trigger to ‘When an item is created’ for SharePoint:
Step 6.2 - Link the Flow Trigger
Link the flow’s trigger to the Content scheduler list.
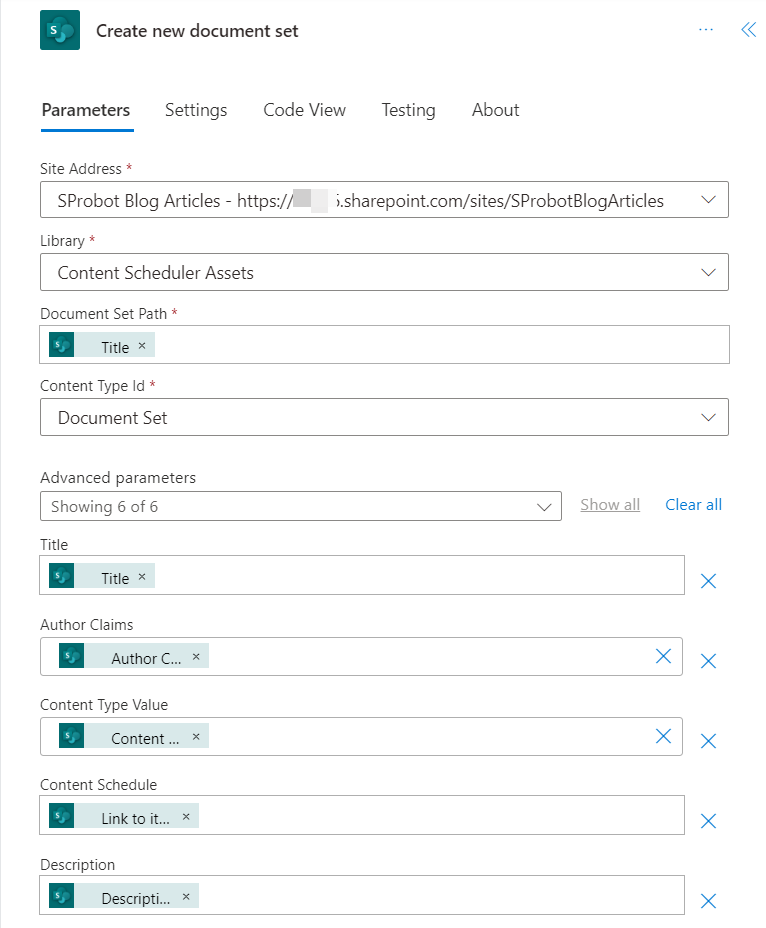
Step 6.3 - Create document set
Once you have connected the flow trigger to the ‘Content scheduler’ list, add the ‘Create new document set’ action, link it to the ‘Content Schedule Assets’ library and add the details from your Content scheduler list item to the new document set as well as the ‘Link to item’ from the ‘When an item is created’ step of the flow, as shown below:
Step 6.4 - Link the new document set to the Content schedule item
With the new document set created to host the assets, we can now link the document set to the original item in our Content scheduler list. To do this, use the ‘Update item’ step and in the ‘Assets’ field, use the ‘Link to item’ value from the ‘Create document set’ step of the flow.

We have now successfully linked the two elements together and will be able to store files, images, and other relevant information for our articles in the document sets and have access to full M365 authoring functionality when working with files.
Step 7 – Testing
With the flow completed and all the configurations done for our lists and libraries, we can test the process and see it in action.
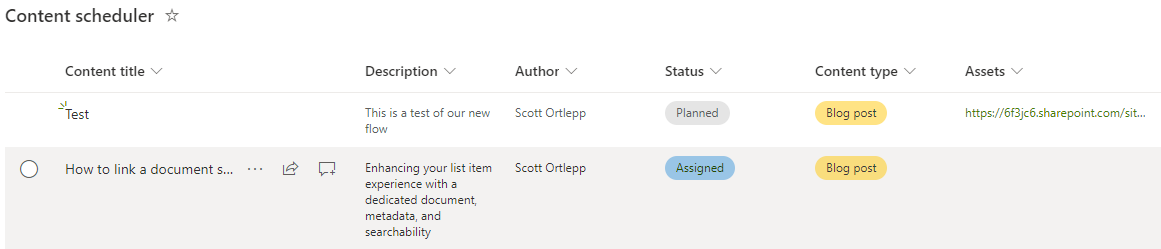
For this, we will create a new item in our Content scheduler list named ‘Test’ and upload some documentation into the corresponding document set in the Content Scheduler Assets library.
Here is our new item in our Content scheduler list:
When we click through to the document set using the hyperlink in the ‘Assets’ column, this is the corresponding document set in the Content scheduler assets library:

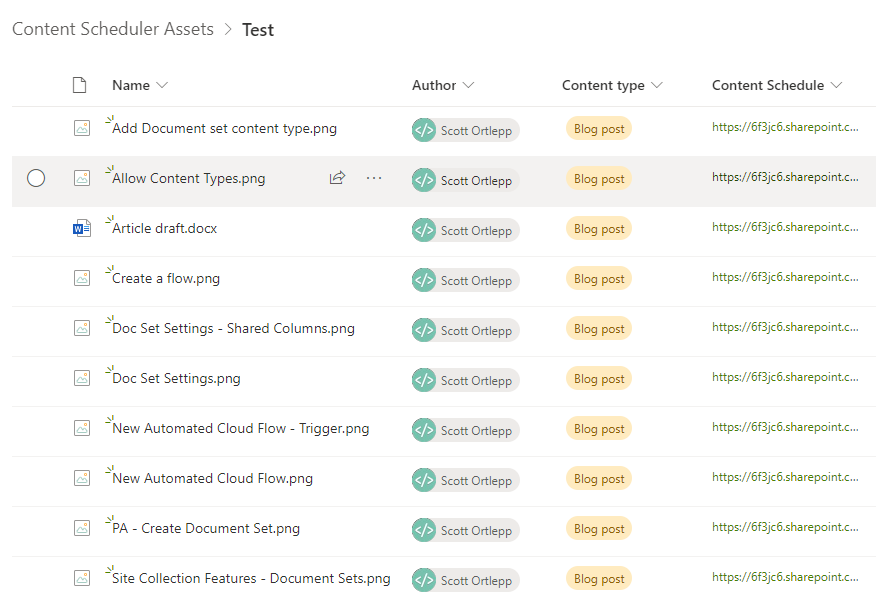
And finally, an example of content inside of our new document set that inherits properties from the document set itself:
Conclusion
By organizing your content into document sets instead of attaching it directly to a list item in SharePoint, you don’t lose authoring functionality such as renaming and editing, and you create a consistent user experience. This will help with workflow and minimize the amount of training and frustration from the users that end up working with your solution.
Bonus: Even more functionality
Whilst the solution described covers our original requirements, there are still a few more steps you can take to enhance it and give it an overall more rounded feel. Here are a few examples of enhancements you can make:
- JSON Formatting on links to the Content Schedule Assets library and back to the Content schedule list.
- An additional flow(s) that handles changes to either the Content scheduler list item or the Content Scheduler Assets library document set.
- Tracking using the Content schedule list item ID.
- Unique views for your Content schedule Assets library view and inside the document sets.


