The accumulation of large files in your SharePoint environment over time can consume a significant amount of storage space, for two reasons:
- If large files are actively used collaboratively (edited by multiple people) their version consumption rapidly increases the overall storage footprint. This is because every single version of a file in SharePoint consumes the file's full size in storage. Practically, something like a 250MB PowerPoint presentation with 100 versions consumes 25GB in total, even though on the surface it only seems like 250MB.
- Very large files are often of the type of content which should not be stored in SharePoint at all. Storing content in SharePoint is beneficial if versioning, automation or permission management is necessary; if it's not, you may want to consider cheaper and simpler alternate storage locations. Content of this kind includes 4K or 8K video, database files, CAD drawings, personal PSTs, or other file formats which aren't related to the Microsoft Office apps.
Purchasing additional storage space for SharePoint Online is a costly monthly expense once you exceed the assigned quota of 1TB base + 10GB per licensed user, so reviewing and cleaning up large files can help avoid or reduce the need to buy additional storage at a premium.
In this article, we will step through several methods to find and remove these files.
If your tenant is close to its limit and you need quick wins, start with this step-by-step playbook for when SharePoint storage is nearly full.
Requirements
Roles & Licensing
- SharePoint Admin – To view and action sites.
- M365 Business or Enterprise License – Any Microsoft Business or Enterprise license that includes SharePoint P1 or P2.
Apps & Modules – Review via PowerShell
- PowerShell – There are several versions and ways to access PowerShell, in our guide we will use PowerShell ISE.
- PnP PowerShell module – This module is used to export the large files report and delete large files. It requires SharePoint Admin to run.
Method 1 – Library views
SharePoint document libraries have a built-in column that enables you to display the file size of all items in your library. Sorting by File Size descending gives you a quick view of the largest files.

However, if you have folders inside your library, the columns will show an item count of items directly below them instead.

To create a view that shows all files without folders, edit your current view in advanced mode and select the ‘Show all items without folders’ option within the ‘Folders’ section and save your changes

Once you’ve found the large files that are no longer needed, you can then manually delete them using the standard SharePoint UI.
Pros of this method
- Immediately available – End-users can create their own views on any library that they have edit access to.
- Context – The users working with the view have context and an understanding of the files returned by the view and can confidently decide to remove any unneeded large files.
Cons of this method
- Limited scope – Views are limited to the library you create them in, if a site has many libraries, this becomes a very tedious exercise.
- Item limits – Library views are limited to 5000 items, libraries with more than 5000 items can be troublesome.
- User dependent – This method relies on users regularly reviewing libraries that they have access to and removing any unwanted large files. Users are very seldom aware that their sites are bloated and cause storage issues, so they are unlikely to proactively take any action.
Method 2 – PowerShell
Step 1 - Generate the report
To generate a report which lists large files, you will need to connect to PnP Online via PowerShell. Ensure that you have the correct admin roles and the App Registration details to allow you to authenticate to your SharePoint instance.
Once connected to your SharePoint site, you can run the following command to fetch all files larger than a defined size (in our example 250MB) in the default ‘Documents’ library for the site:
Get-PnPListItem -List <Library Title> | Where-Object {($_.FieldValues.SMTotalFileStreamSize/1mb -gt 250) -and ($_.FieldValues.FileLeafRef -like "*.*")}For a full report on all libraries with a site, you can run the Large Files Report.ps1 script once you have updated the following variables:
- SiteURL – This is the site that you want to run the report on.
- AppRegistrationId – The App Registration Client ID that will allow you to authenticate to your environment.
- FileSize – The minimum file size, in megabytes, that will be returned in the report.
- CSVReportPath – Where the report will be exported to.
Step 2 - Review the report
Once the report has been generated, you will need to review the results and remove any files that should remain in the library. Any files that remain in the report will be deleted in the next step.
Step 3 - Remove unwanted large files
To remove unwanted large files, you need to run the following command:
Remove-PnPListItem -List <Library Title> -Identity <Document ID>If you want to perform this action in bulk, you can run the Delete Large Files.ps1 script. Once you have updated these variables:
- SiteURL – The site that you want to run the report on.
- LargeFileReportPath – The report that we worked on in the previous steps.
* Note: Allitems that are removed will go through the standard recycle bin process. To find out more about emptying the recycle bin via PowerShell: Clear-PnPRecycleBinItem| PnP PowerShell
Pros of this method
- Detailed report – Scripting allows for detailed reporting.
- Bulk actions – Reporting and deletion can be actioned in bulk.
- Multiple libraries – The reports can be run against all libraries within the site at once.
Cons of this method
- Manual – Whilst the script handles the generation of the report and the deletion of the files, it’s still a manual process for the admin to review the results.
- Long runtimes – depending on the number of items in the libraries, the scripts take a long time to run, need to be monitored, and cannot be paused midway through.
- Bulk Deletions – Bulk deletions via script can be risky to perform and the incorrect content could be accidentally deleted (although it can be recovered from the recycle bin).
Method 3 – SProbot
SProbot’s Large file reports makes it easy to identify, review, and clear unwanted large files within identified sites on your tenant.
Large files hurt most when version history multiplies them - see how to trim versions safely. If large files are also stale, treat them as inactive files and clean them up with owner validation.
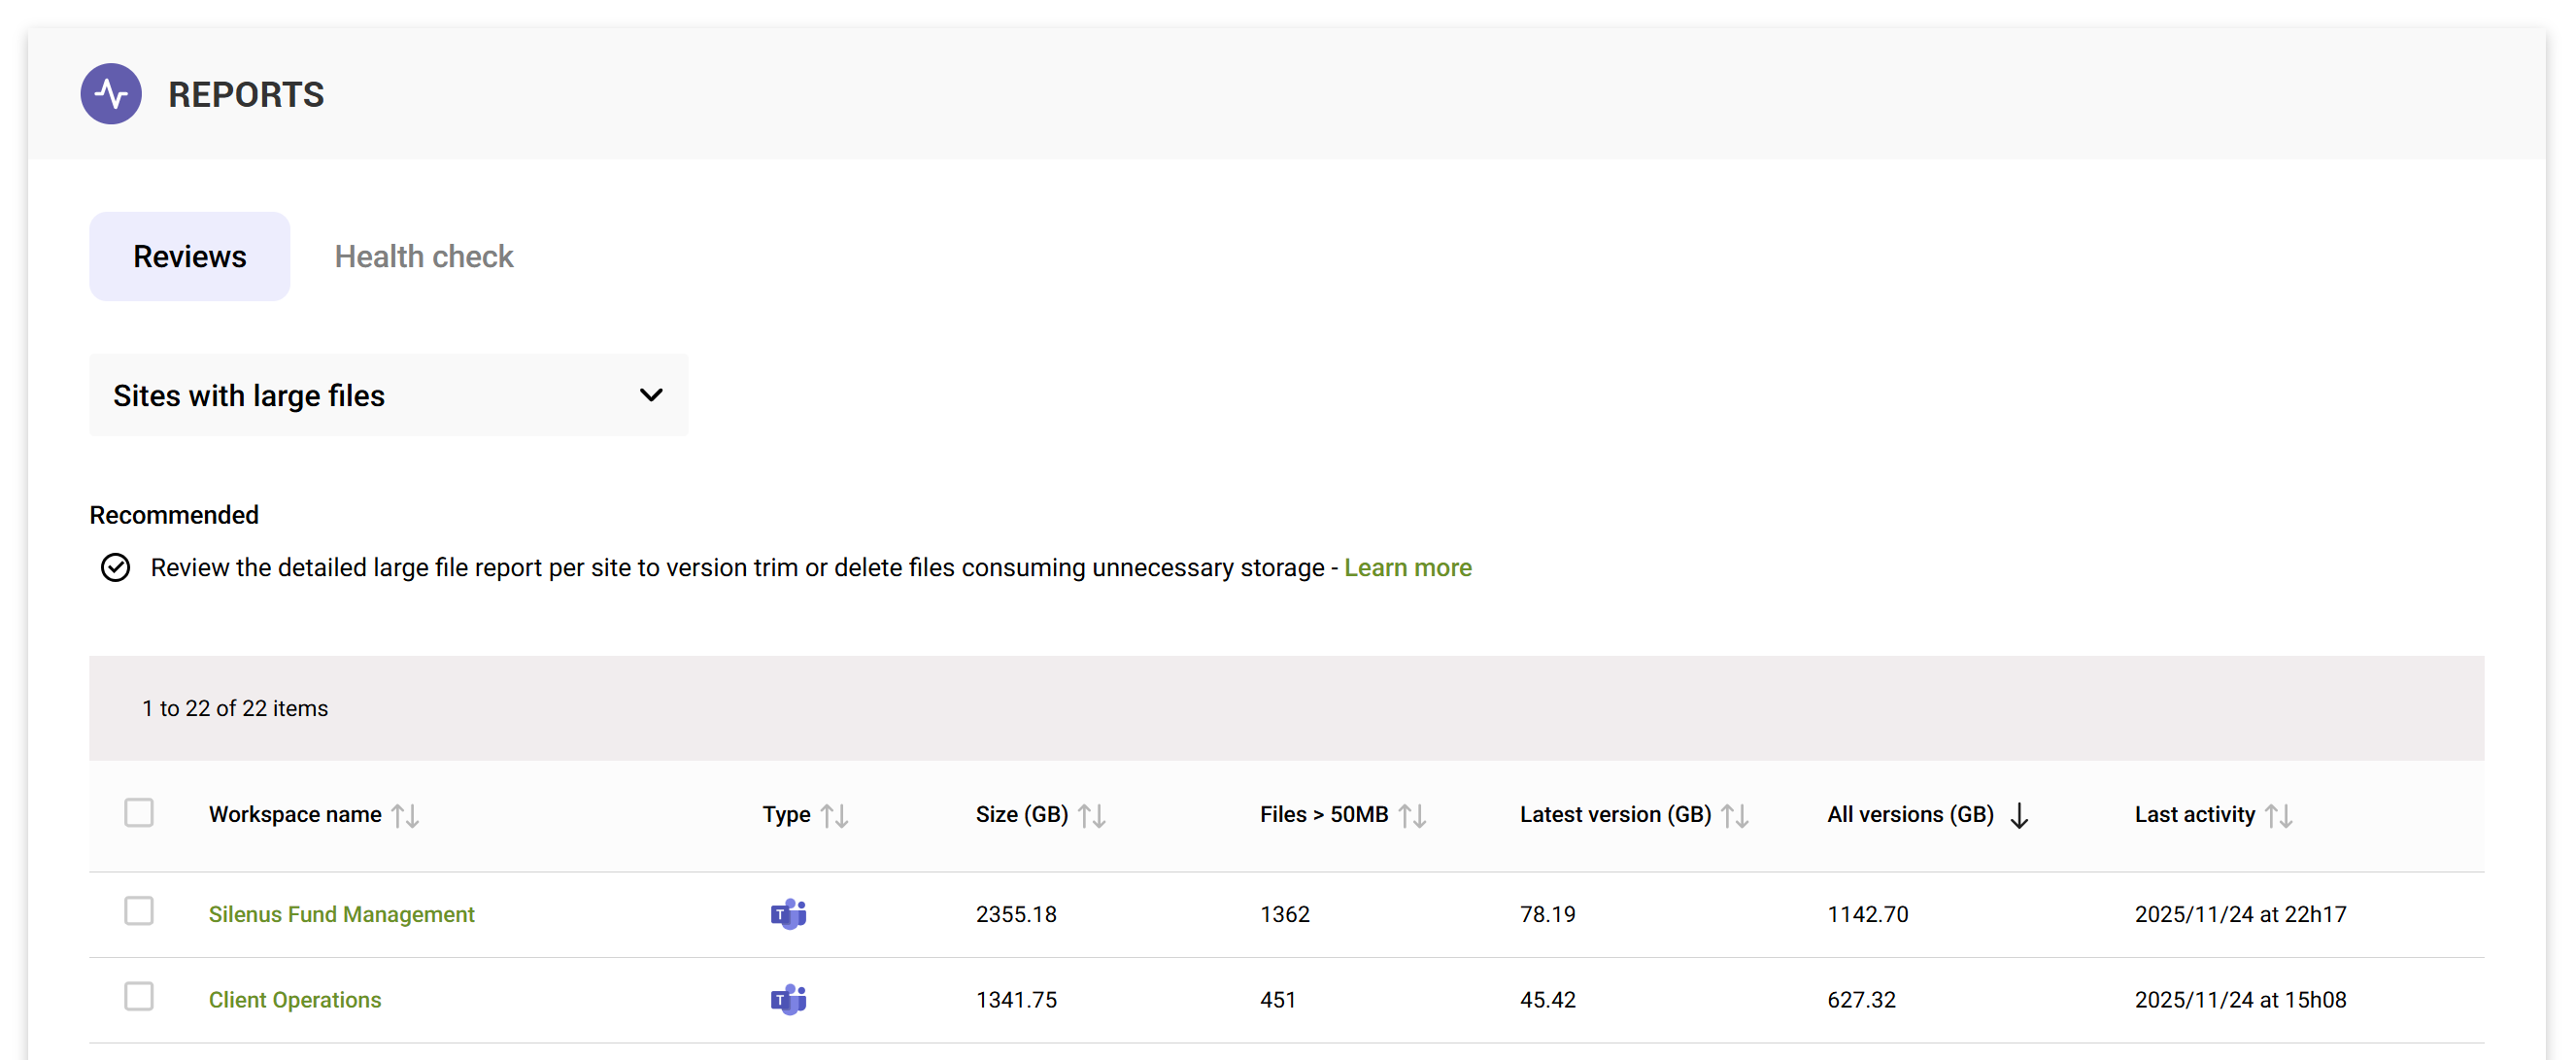
Step 1 – Identify sites which contain the most large files, or where the most storage is consumed by large files
Use the Sites with large files review to:
- Identify sites which contain files larger than 50MB.
- Determine which sites have the largest consumption differential between latest versions, and all other versions.
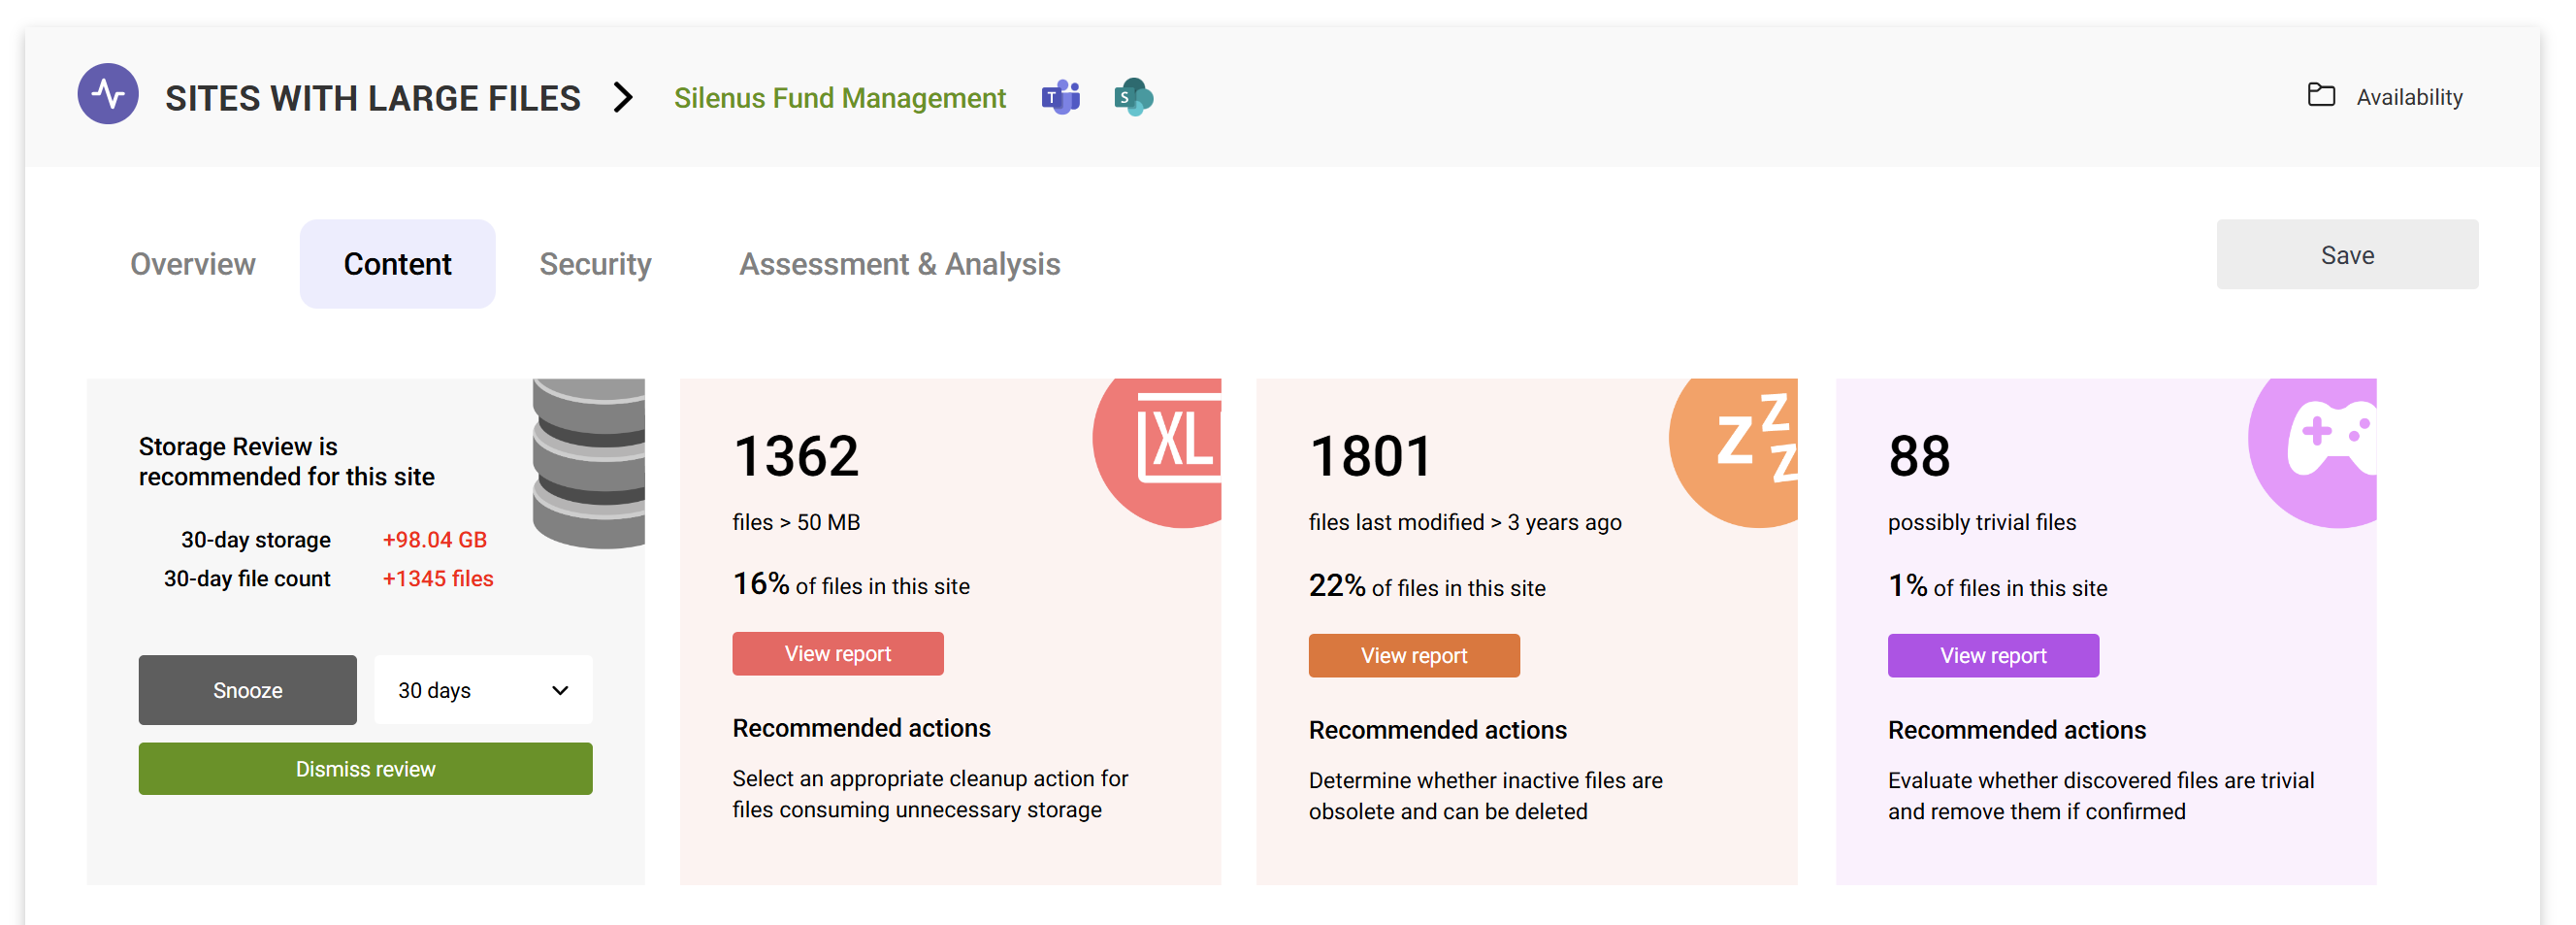
Step 2 – View a detailed large file report within identified sites
Within a selected site’s Storage tab, you can see a count of large files.
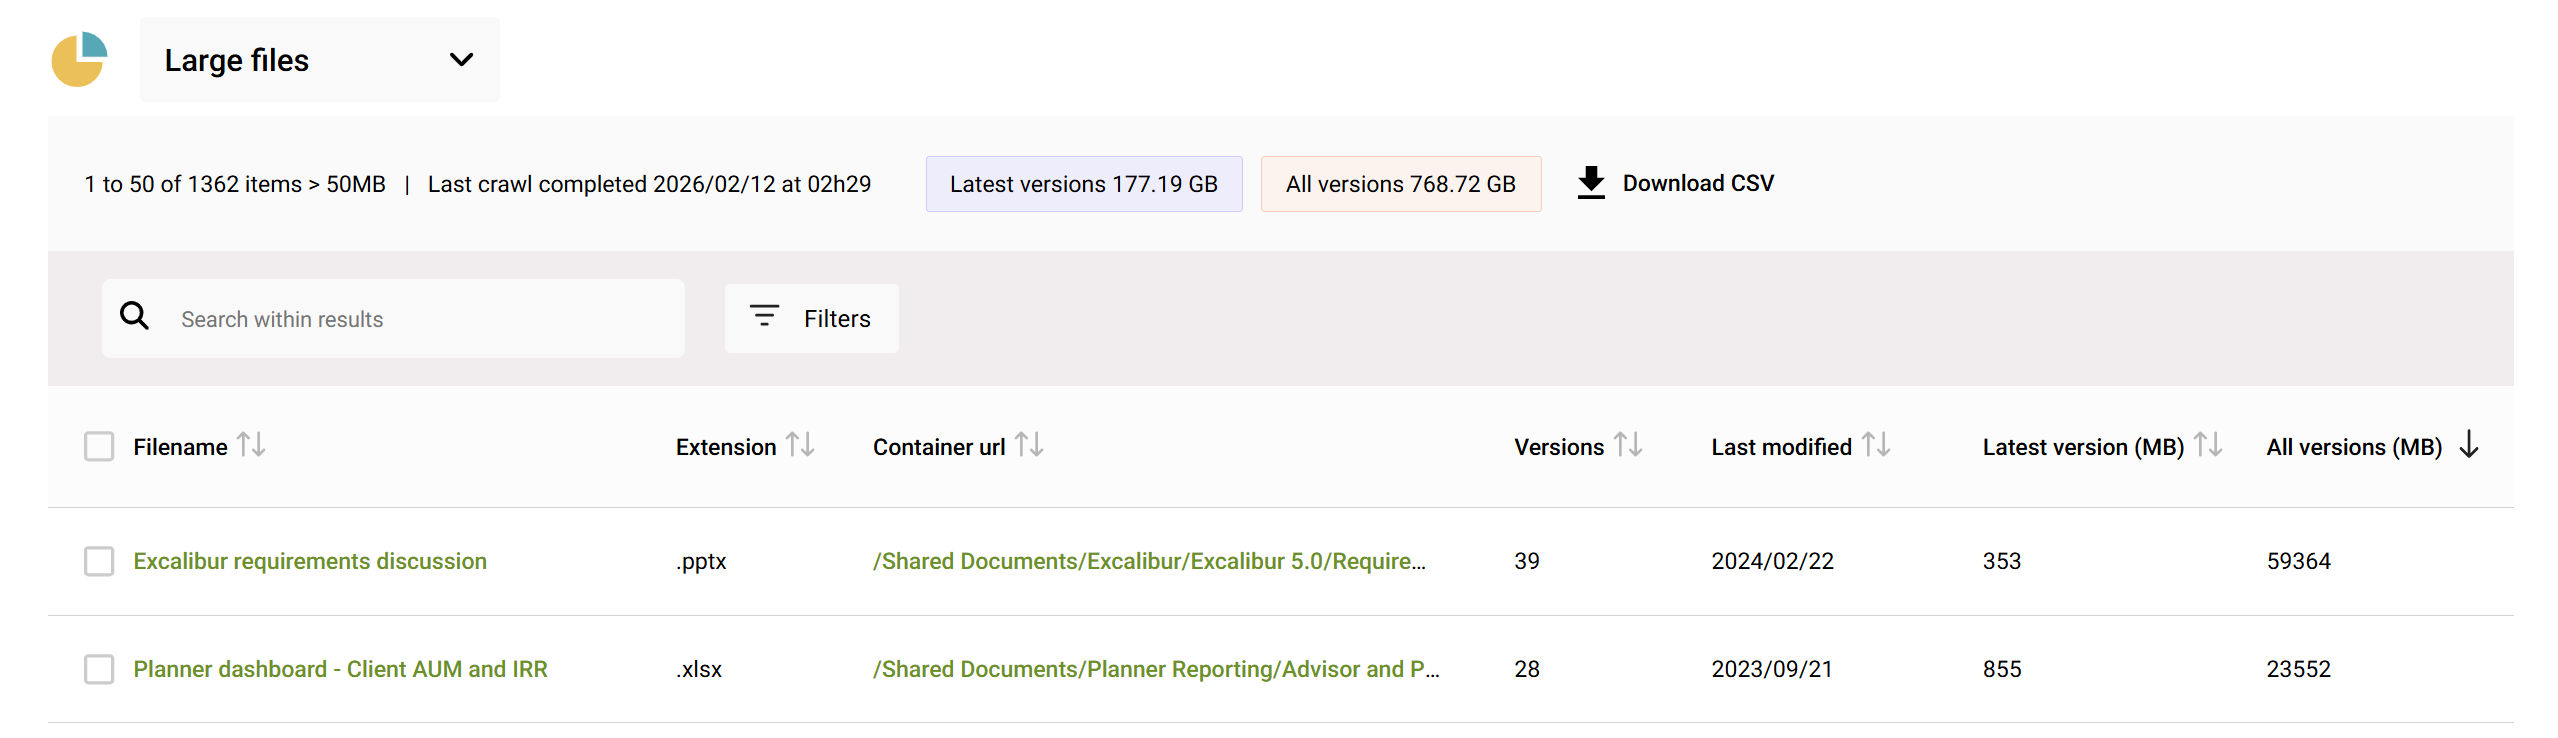
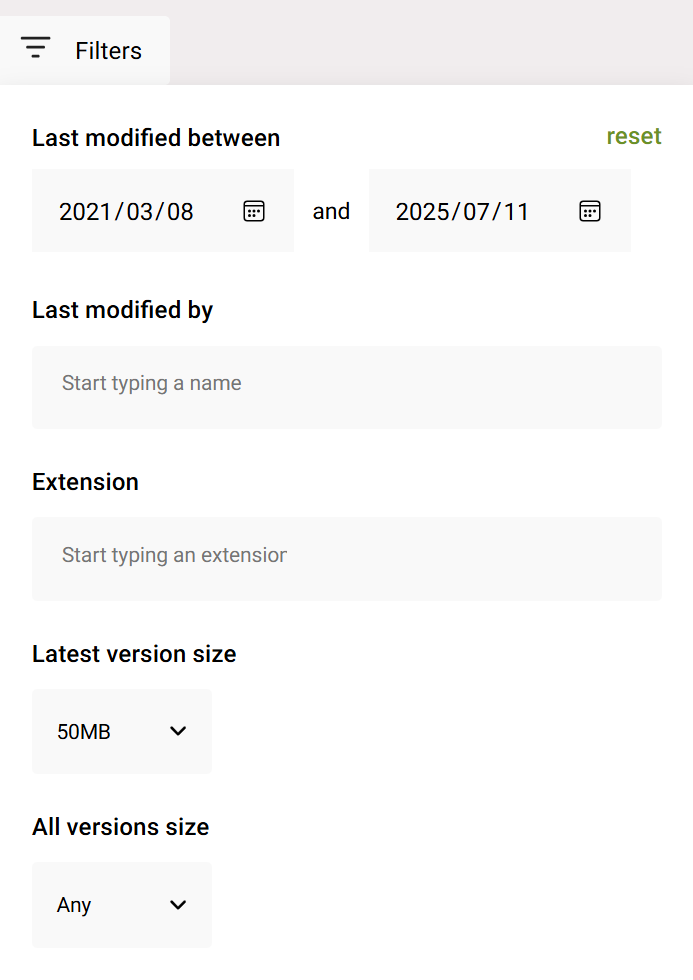
Viewing the report displays a list of results, and you can search and filter on date range, author, extension and version sizes.
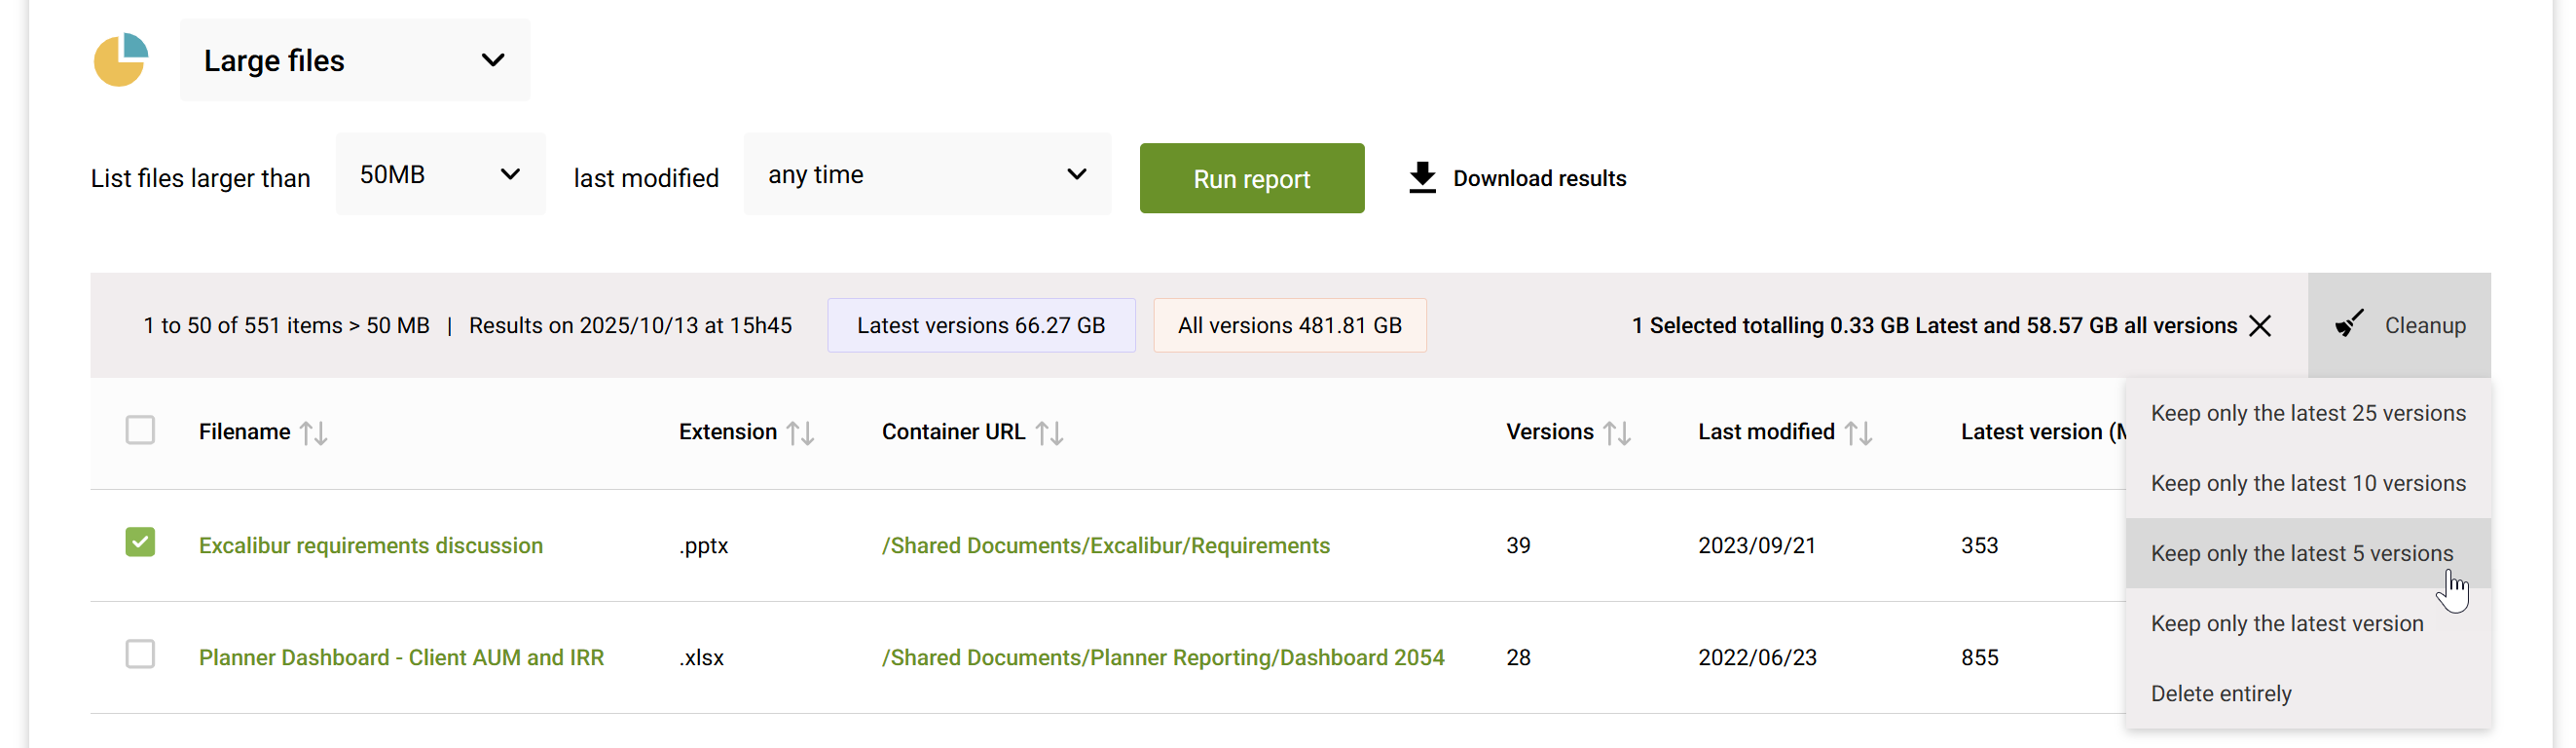
Step 3 – Delete or trim versions
When you select files which have an unnecessary number of versions (or are unwanted entirely, or shouldn't be in SharePoint), you can choose to either trim their versions to 25, 10, 5 or the latest, or delete them entirely.
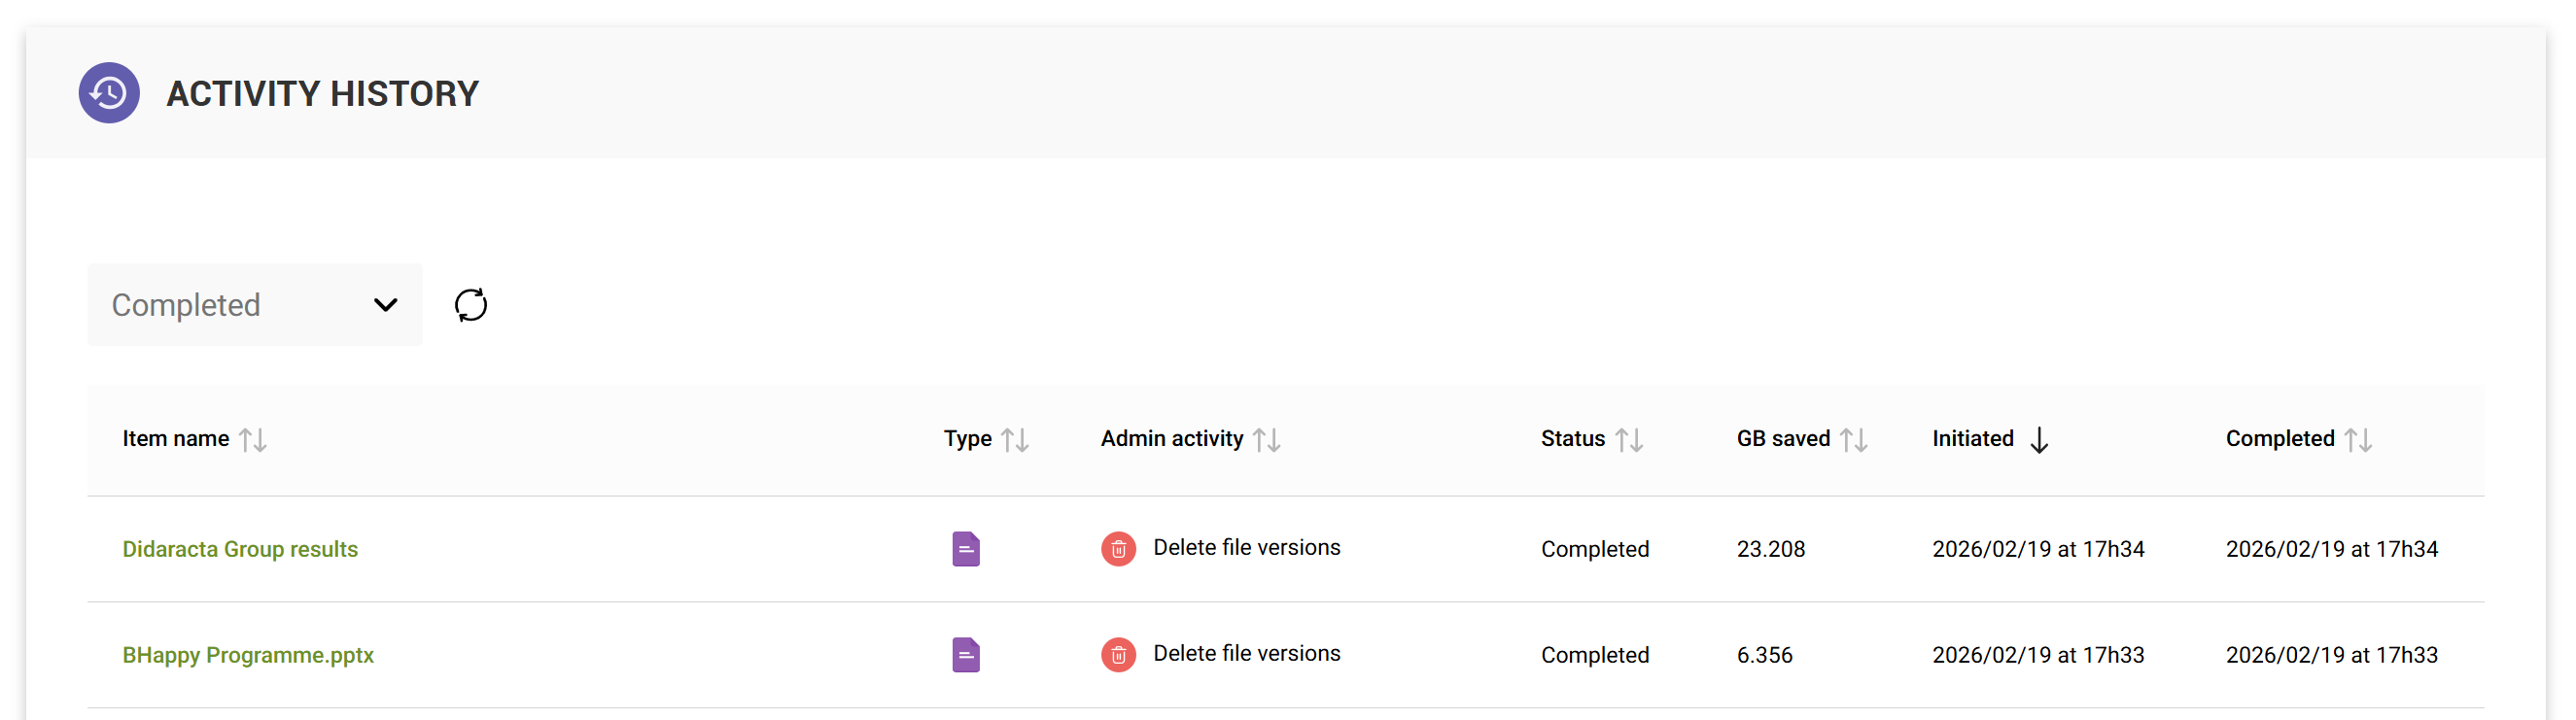
You can also see a full activity history of cleanup actions and how they've contributed to your storage saved.