Knowing how much SharePoint storage you’re using - and where - is key to managing capacity and avoiding surprise costs. Here’s how to check your usage quickly and accurately.
Method 1 - The Microsoft 365 admin center
The easiest way to check storage is through the Admin Center. Go to Reports > Usage > SharePoint > Storage
Method 2 - The SharePoint admin center
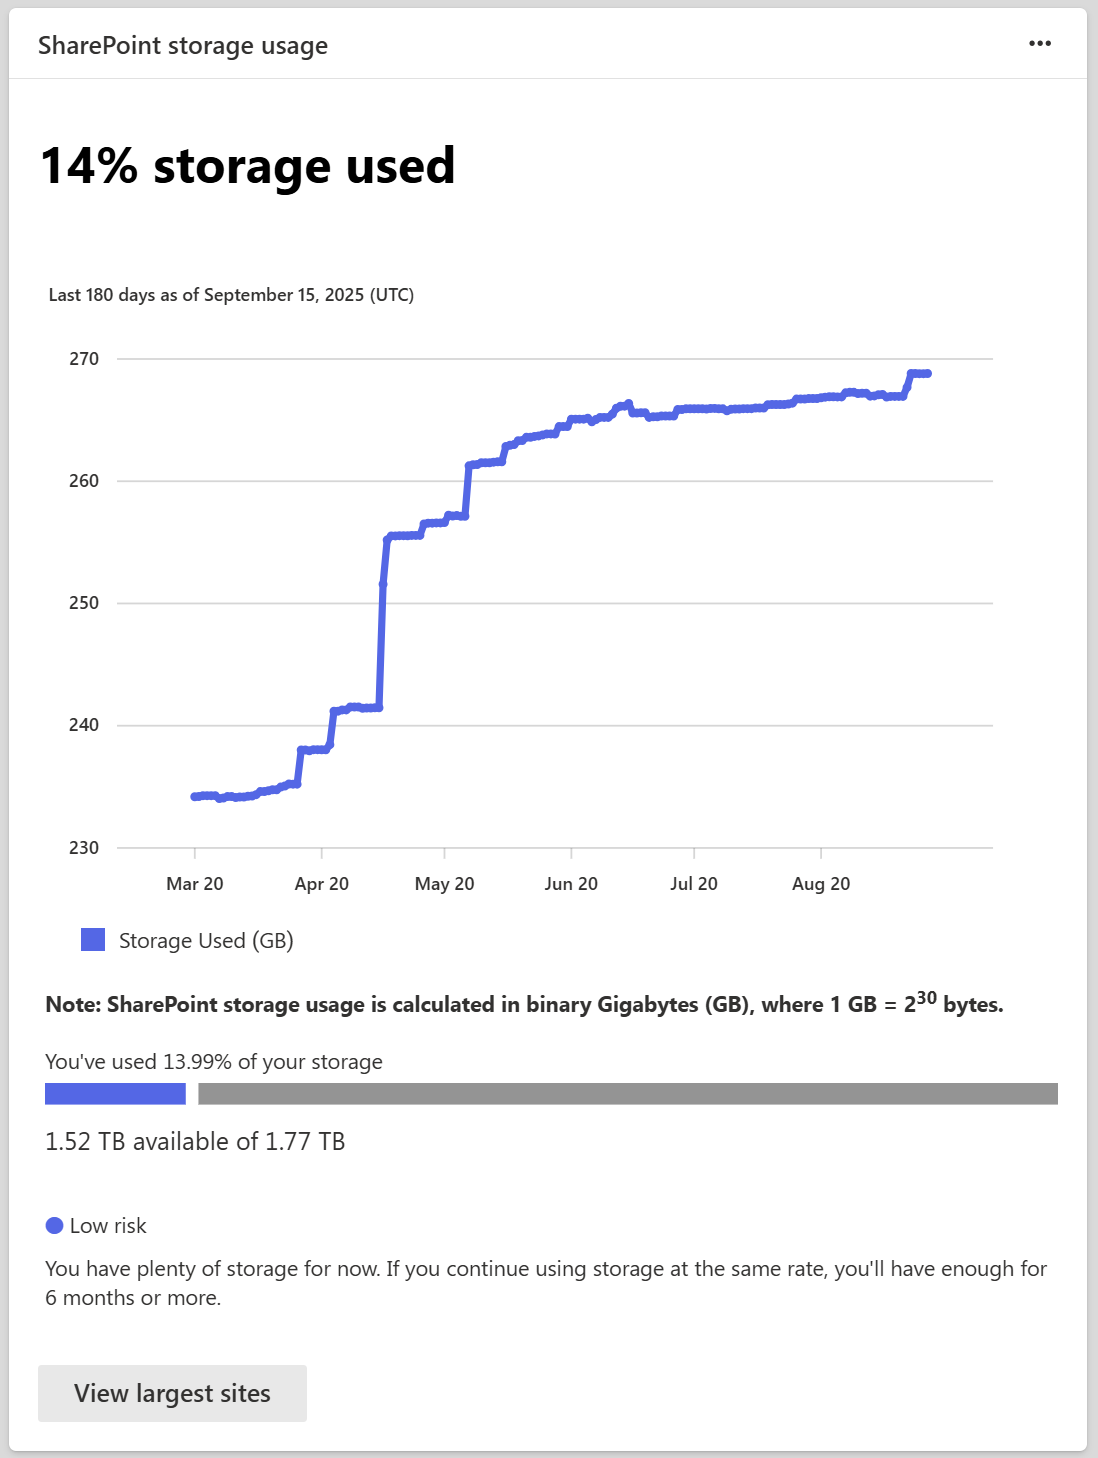
Overview card
On the Home page of the SharePoint admin center, scroll to the Storage usage card. It shows:
- % of storage used.
- A graph of storage consumption for the previous 180 days.
- Storage available GB.
- A summary of how long the current capacity is expected to last.
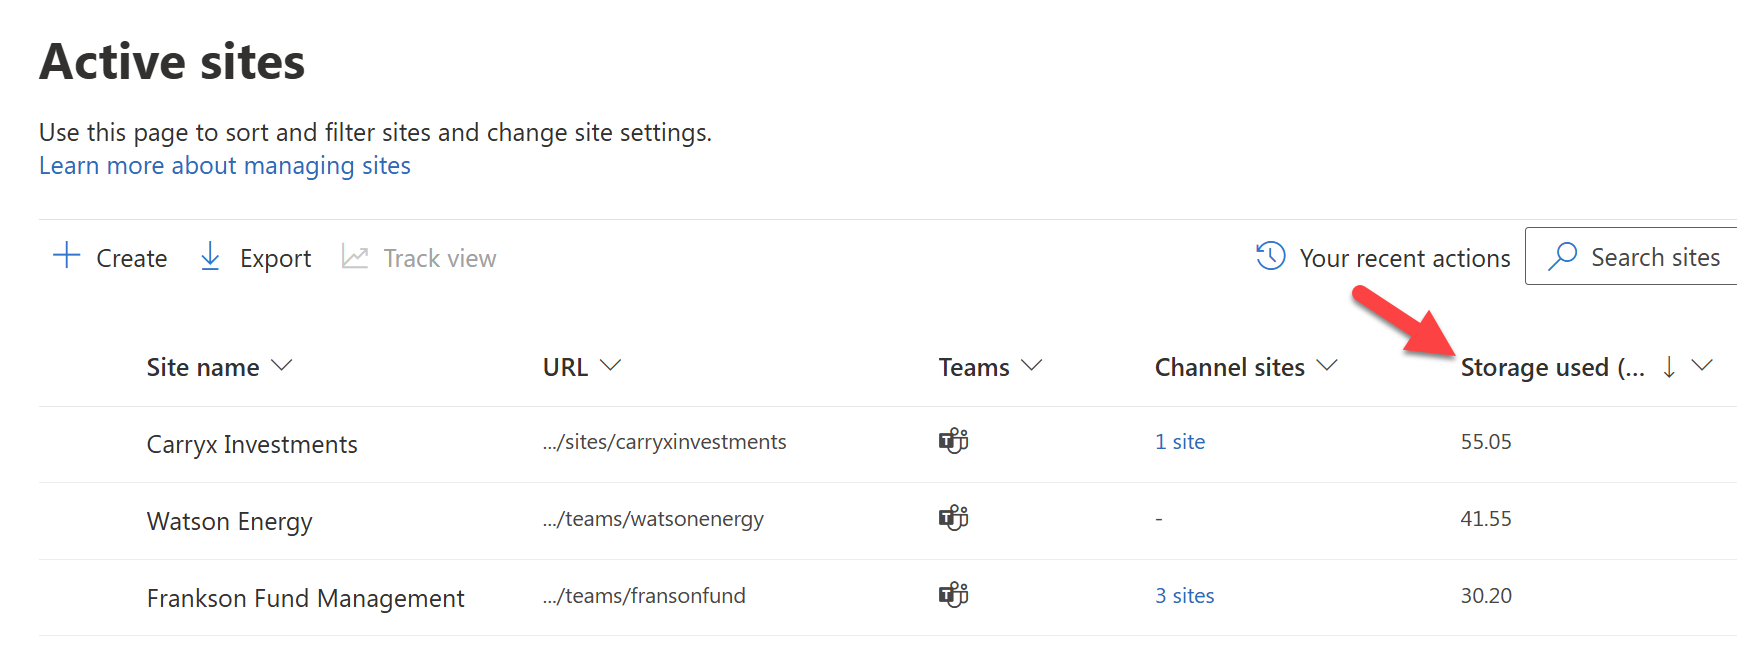
Storage used column per site
In the Active sites view, you can use the Storage used column to sort from largest to smallest sites:
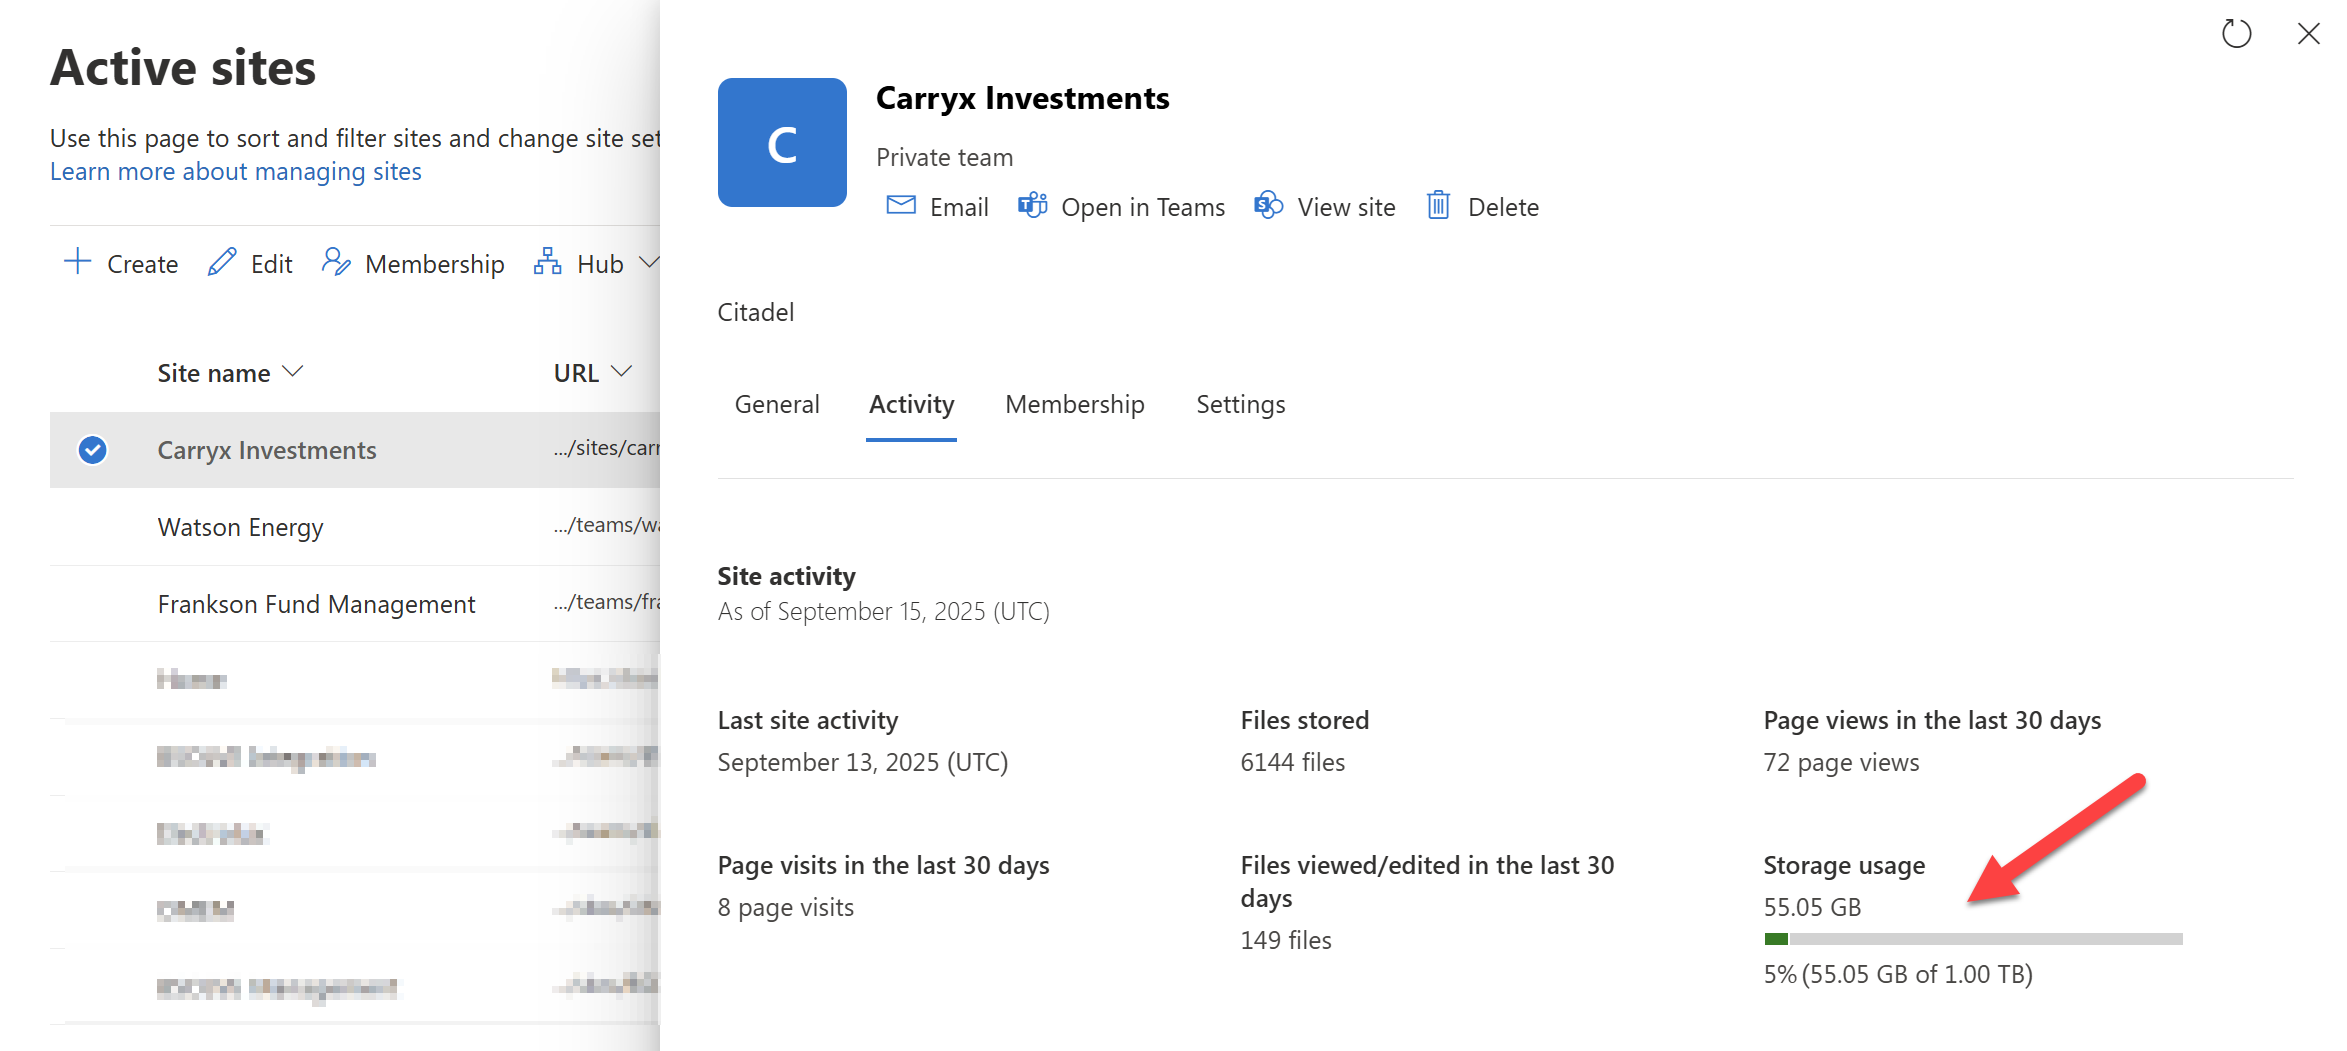
You can also see a detailed bar graph for a specific site by opening its details panel:
Method 3 - Check individual site storage
To view storage for a specific site:
- Go to the site’s Settings
- Click Site Collection Administration
- Select Storage Metrics
This shows a breakdown of storage by folder and file type, helping you pinpoint what’s consuming space.
Method 4 - Use SProbot for deeper insights
SProbot can enhance your visibility by:
- Identifying large files across all sites
- Highlighting version-heavy files
- Flagging inactive or orphaned sites
- Recommending cleanup actions
The Health check provides an overview of your storage, with the ability to delve into detail to clean up sites highlighted as extremely large or fast growing.
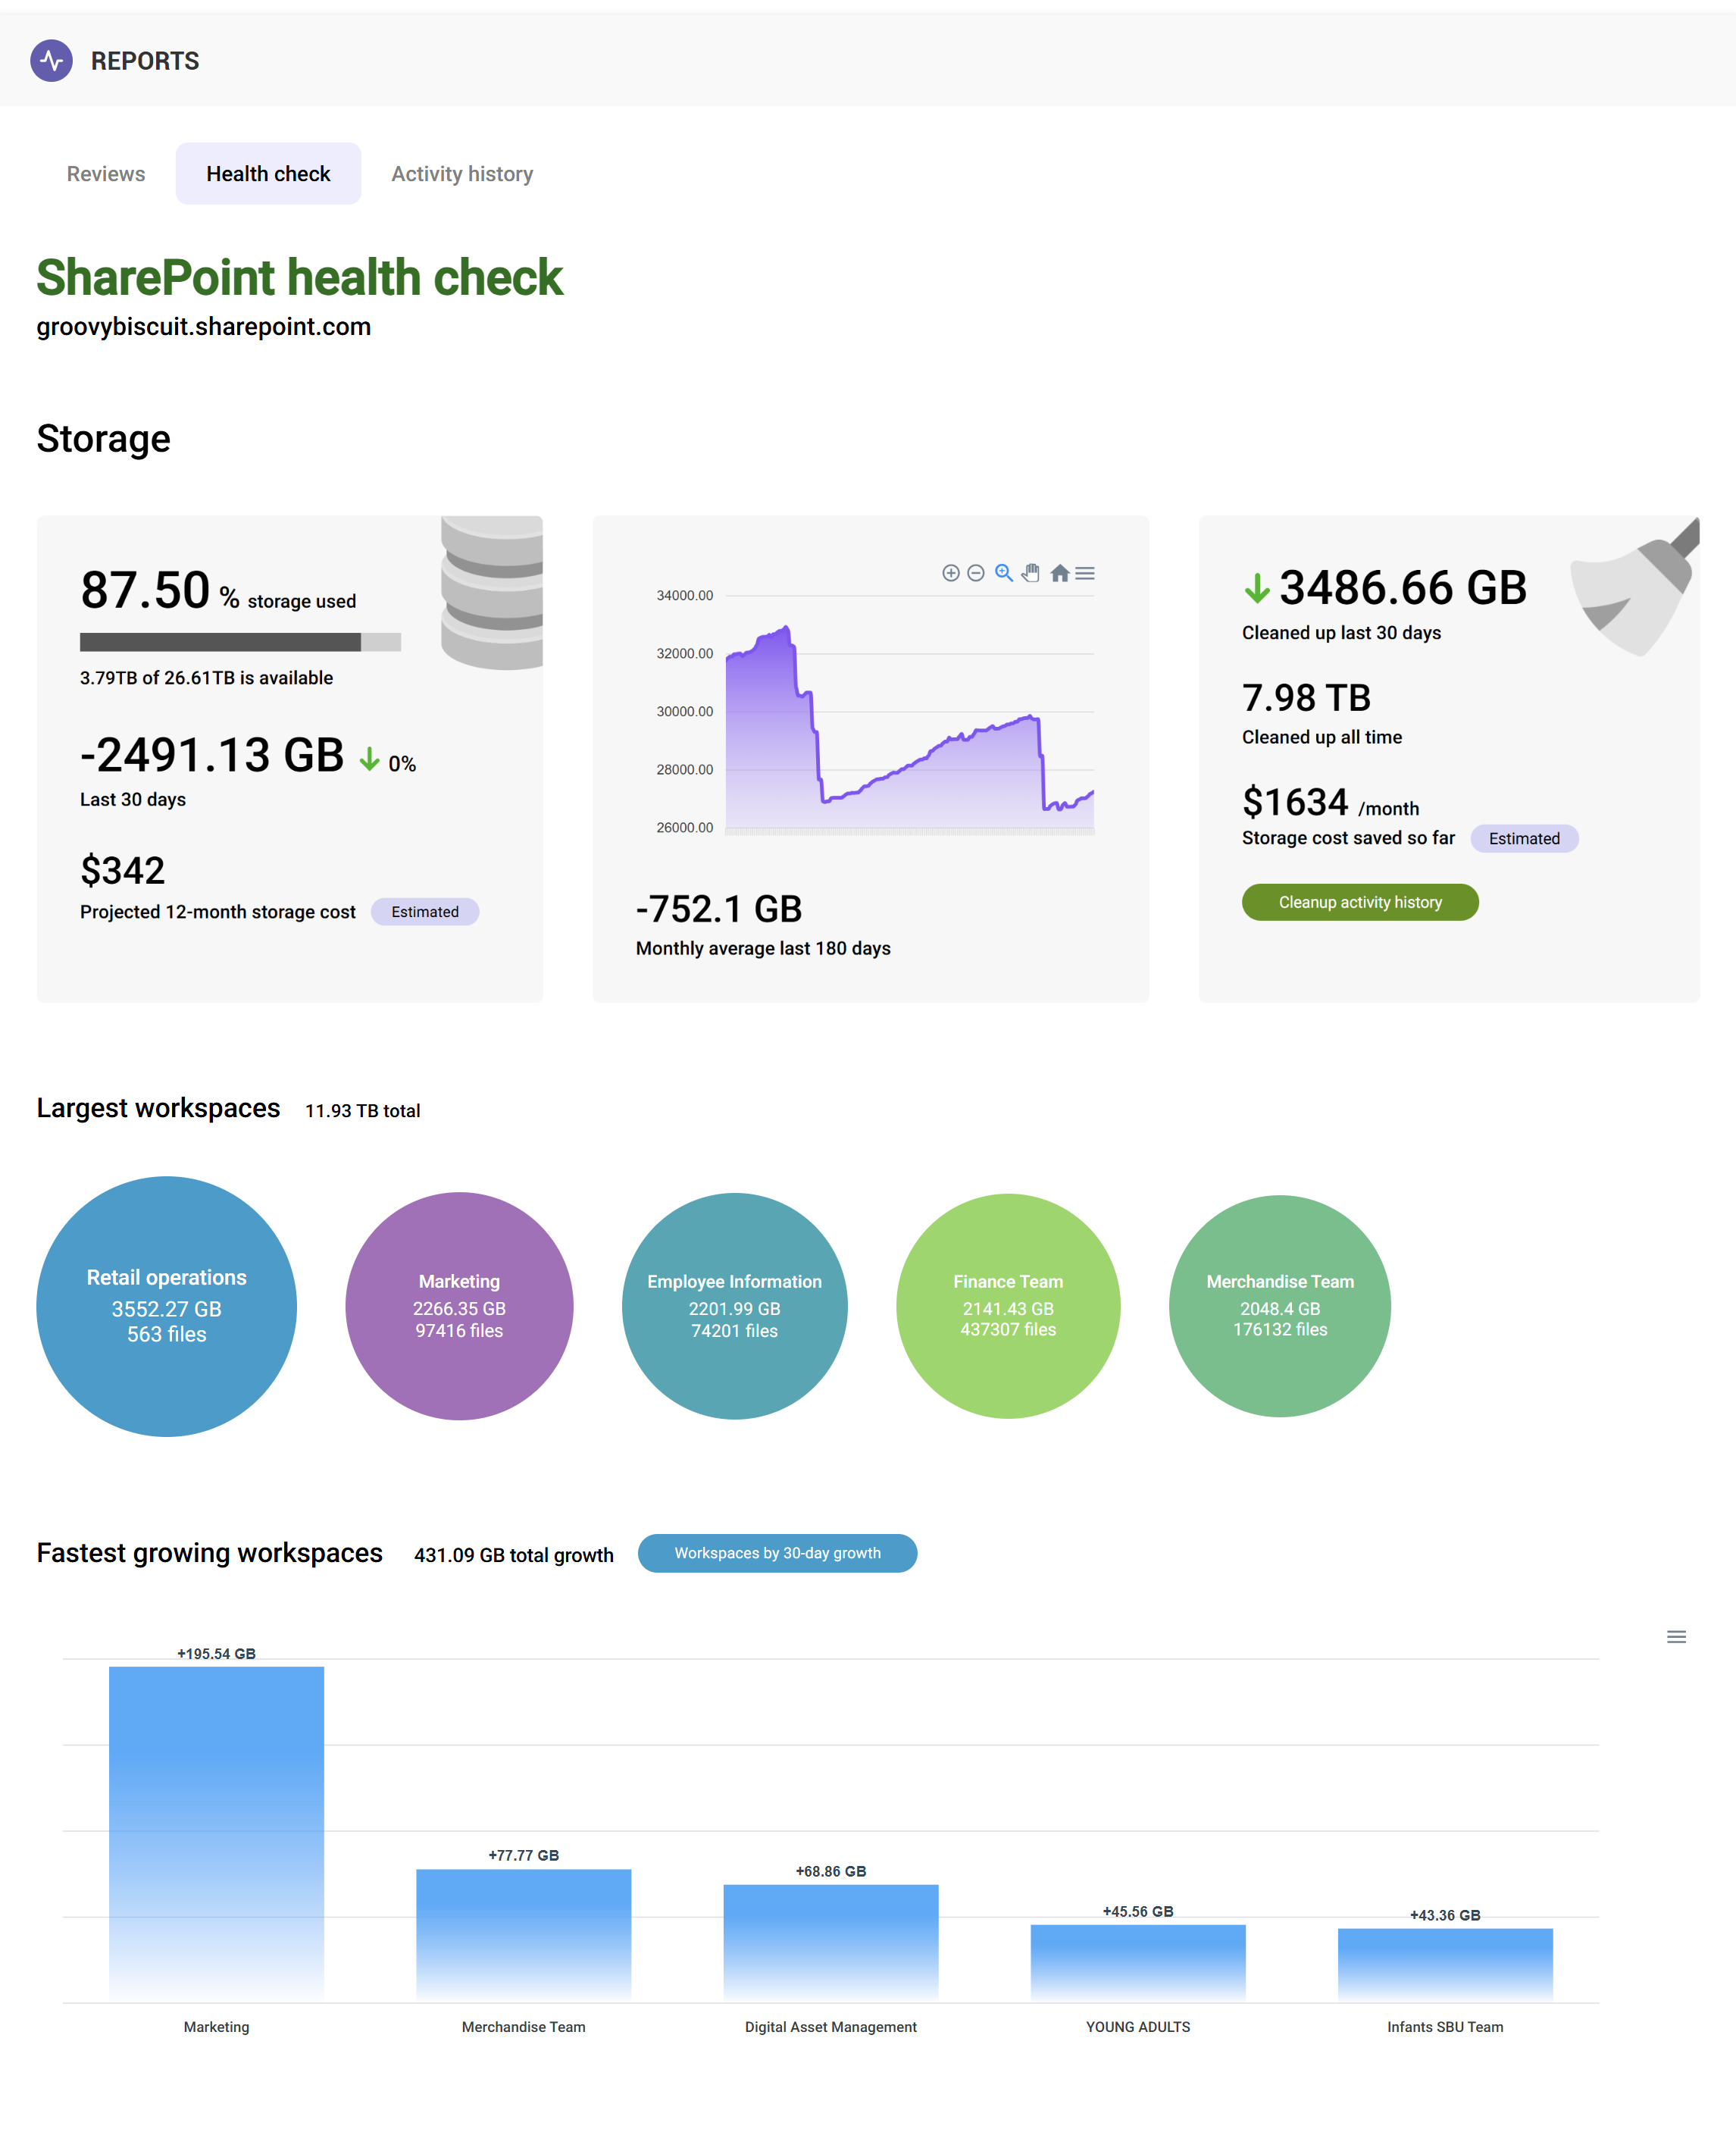
This helps you go beyond basic metrics and take action.
🔗 Related reading: Proven ways to reclaim SharePoint storage
What to do after checking
Once you’ve reviewed your usage:
- Archive inactive sites
- Trim version history
- Delete large unnecessary files
- Find and remove inactive files
These steps can help reclaim space and reduce the need for paid storage.
Final thoughts
Checking SharePoint storage is the first step toward managing it effectively. With the right tools and regular monitoring, you can stay ahead of growth and avoid unnecessary costs.